Summary of WeMos D1 Mini Pro Flash NodeMCU Firmware
This article details how to flash NodeMCU firmware onto the WeMos D1 mini Pro, a board with 16 MB of flash memory. It explains that the ESP8266 NONOS SDK V1.5.4.1 incorrectly defaults to 512 KB for larger flashes, causing boot loops. The guide provides a workaround involving specific flashing commands and manual placement of initialization data to utilize the full capacity for SPIFFS storage after the initial 4 MB.
Parts used in the WeMos D1 mini Pro Firmware Flash:
- WeMos D1 mini Pro board
- USB to serial driver (Silicon Labs)
- Python 2.x interpreter
- esptool.py utility
- pySerial library
- Esplorer software
- ESP8266 NONOS SDK V1.5.4.1 (specifically esp_init_data_default.bin)
- Custom built NodeMCU firmware binary
- NodeMCU WebIDE
- gen_dummy.lua script
This instructables show how to flash NodeMCU firmware to WeMos D1 mini Pro.
Step 1: Introduction
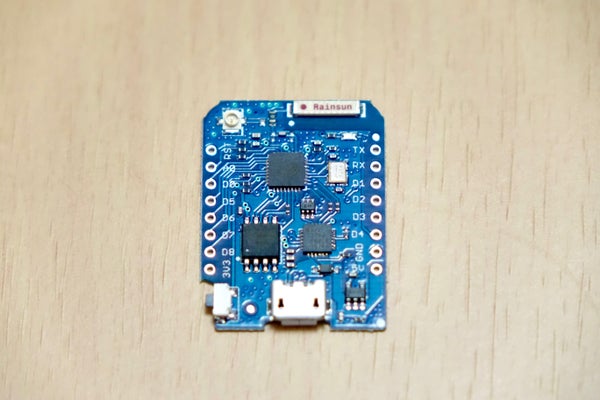
WeMos D1 mini Pro is a new ESP8266 dev board.
It is thin, light weight, built-in USB to serial chip and 16 MB flash!
Recently, it is the only board with built-in 16 MB flash (at least 4 times of flash space compare with other ESP board). However, there are still no one on the web know how to utilize all 16 MB flash space. (In Arduino, you can treat it as a normal 4 MB version ESP board but nothing more)
I can flash an older version (1.5.1 SDK) NodeMCU firmware to a 16 MB ESP board in my previous instructables. But when I flash the most recent version (1.5.4.1 SDK) of NodeMCU firmware to this board, it will loop forever on the rf_cal_size reboot.
After days of subsequent test, I found the SDK limitation and know the workaround to overcome this. This instructables show how to do that.
Step 2: Preparation
WeMos D1 mini Pro
You may order this at: https://www.aliexpress.com/store/product/WEMOS-D1-…
Download and install USB driver
https://www.silabs.com/products/mcu/Pages/USBtoUAR…
Download and install Python 2.x
Home page: https://www.python.org/
Download link: https://www.python.org/ftp/python/2.7.12/python-2….
Download and install esptool.py
Follow “Easy Installation” Section: https://github.com/espressif/esptool
Quota from manual install:
you may have to install pySerial manually by running something like pip install pyserial, easy_install pyserial or apt-get install python-serial, depending on your platform.
Download and install Esplorer
Project page: https://esp8266.ru/esplorer/
Download link: http://esp8266.ru/esplorer-latest/?f=ESPlorer.zip
Download and extract bin from SDK patch
Download page: http://espressif.com/en/support/download/sdks-demo…
Download link: http://espressif.com/sites/default/files/sdks/esp8…
Extract file: esp_init_data_default.bin
Step 3: ESP8266 NONOS SDK V1.5.4.1 Limitation
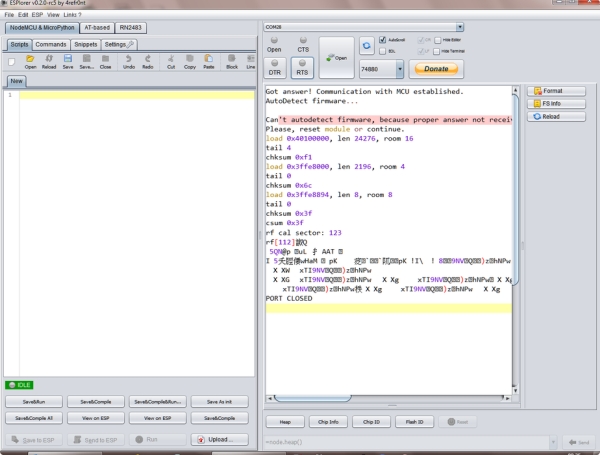
ESP8266 NONOS SDK V1.5.4.1 use the flash memory last 5 sectors (@4096 bytes) to store the system data. The SDK can detect the flash size correctly while the flash size within the range from 256 KB to 4 MB. I guess because there are no ESP board with flash larger than 4 MB before, the SDK not defined 8 MB and 16 MB flash size. So, SDK failed to detect 8 MB and 16 MB flash correctly and fall back to the default size (512 KB).
The screen capture is the boot up message after flashed latest (2016/11/11) dev branch. The message “rf cal sector: 123” should mean the last 5th sector of 512 KB.
SDK use the 5 sectors just before 512 KB to store the system data is ok, but it introduce some rules on flashing firmware:
- firmware size cannot over 491 KB (the space before the system data)
- remember treat it as 512 KB flash size while flashing
- manual flash the esp_init_data (part of system data) to the correct place (last 4th sector)
After SDK boot process, NodeMCU firmware is intelligent enough to detect the correct flash size and format the remained ~15.48 MB flash size to SPIFFS. It can store Lua code and other resource files, GREAT!
Step 4: Custom Build NodeMCU Firmware
Build your tailor-made firmware at NodeMCU custom builds website: https://nodemcu-build.com/
Submit build request -> wait build complete email -> download firmware
Suggest use master branch and remember limit selected modules to meet the firmware size not over 491 KB.
In case you don’t want to build your own firmware, you can test with my attached firmware.
Step 5: Erase Flash
It is better to cleanup the flash first before flash the firmware.
Run in console:
python esptools.py -p /dev/cu.SLAB_USBtoUART erase_flash
Erase flash operation is an async process, ESP board still running erase process after command return.
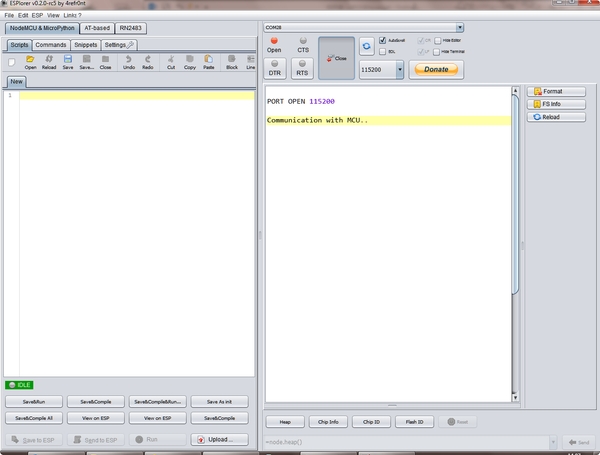
Open Esplorer, connect and wait (within a few minutes) some kind of response, that means erase process finished.
P.S. “/dev/cu.SLAB_USBtoUART” is the com port name, in Windows, it should be something like “com??”
Step 6: Flash Firmware
Put the custom build firmware file and esp_init_data_default.bin (extract from SDK zip) to current folder.
Run in console:
python esptool.py -p /dev/cu.SLAB_USBtoUART -b 921600 write_flash -ff 80m -fm qio -fs 4m 0x0 nodemcu-master-21-modules-2016-11-09-16-08-01-integer.bin 0x7c000 esp_init_data_default.bin
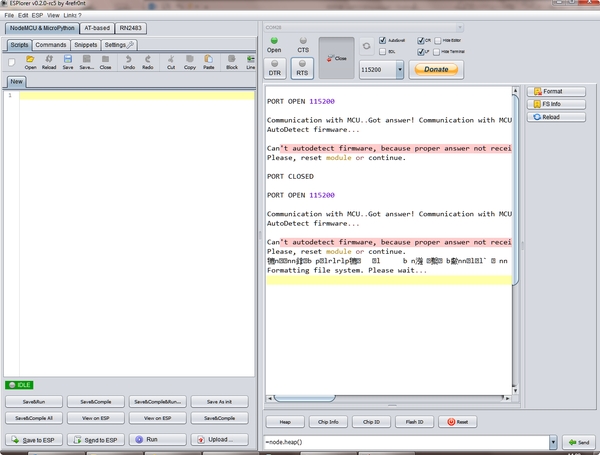
Open Esplorer, connect and press reset button on the ESP board.
Esplorer show “Formatting file system. Please wait…” message.
Wait a few minutes for format finish and then Esplorer will show Lua startup message.
P.S.
- “/dev/cu.SLAB_USBtoUART” is the com port name, in Windows, it should be something like “com??”
- “-fs 4m” means 512 KB flash size
- “nodemcu-master-21-modules-2016-11-09-16-08-01-integer.bin” is the firmware file name, you may replace with your filename
- 0x7c000 is the address of the last 4th sector for 512 KB flash
Step 7: Testing
The first 4 MB flash space should run normal as other ESP board. I would like to test the last part of flash space also can run normally.
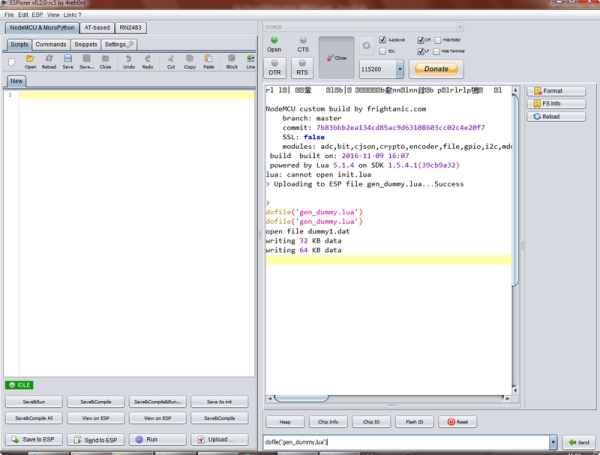
Here is my testing steps:
- upload gen_dummy.lua script (script for generate 15 dummy files at 1 MB each)
- run gen_dummy.lua for fill up first 15 MB of SPIFFS space (last tens of minutes)
- upload NodeMCU WebIDE (https://github.com/moononournation/nodemcu-webide)
- restart ESP board
- check NodeMCU WebIDE run normal
testing result:
- at step 2 I found it hanged while generating 14th dummy file, so I remove last 2 dummy files before step 3
- gen dummy files obviously slower while nearly full
- upload further files failed even removed last 2 dummy files, so I remove last 5 dummy files (remain dummy1-9) and upload again
- NodeMCU WebIDE works fine!
Step 8: Happy Coding!
WeMos D1 mini Pro is thin, light weight, built in USB to serial chip and 16 MB flash. (although last few MBs may not usable)
It’s time to use it build a tiny powerful IoT!
Source: WeMos D1 Mini Pro Flash NodeMCU Firmware
- Why does the WeMos D1 mini Pro loop on reboot when flashing recent NodeMCU firmware?
The SDK fails to detect 16 MB flash size correctly and defaults to 512 KB, causing it to use the wrong sectors for system data. - How can I overcome the SDK limitation regarding flash size detection?
You must manually flash the esp_init_data_default.bin file to the correct address while telling the tool to treat the flash as 4 MB. - What is the maximum firmware size allowed for this process?
The firmware size cannot exceed 491 KB to leave room for the required system data sectors. - Which Python version is required to run the esptool.py script?
Python 2.x is required, specifically version 2.7.12 or similar. - How do I erase the flash before flashing new firmware?
Run the command python esptools.py -p [port] erase_flash and wait for Esplorer to confirm completion. - What does the -fs 4m flag mean in the flash command?
It instructs the tool to treat the hardware as having a 512 KB flash size despite the actual 16 MB capacity. - Where should the esp_init_data_default.bin file be placed during flashing?
It must be flashed to address 0x7c000, which corresponds to the last 4th sector of the simulated 512 KB space. - Can the remaining flash space be used for storing files after booting?
Yes, NodeMCU firmware detects the correct size and formats the remaining ~15.48 MB to SPIFFS.