In this tutorial, we design an Arduino Uno Robotic Arm. Entire arm will be designed from some scrap material and servos. Entire process of construction has been explained in detail below. The arm has been built with cardboards and the individual parts have been locked to servo motors. Arduino Uno is programmed to control servo motors. Servos are serving as joints of Robotic arm here. This setup also looks as a Robotic Crane or we can convert it into a Crane by some easy tweaks. This project will be very helpful for beginners who want to learn to develop a Simple Robot in low cost.
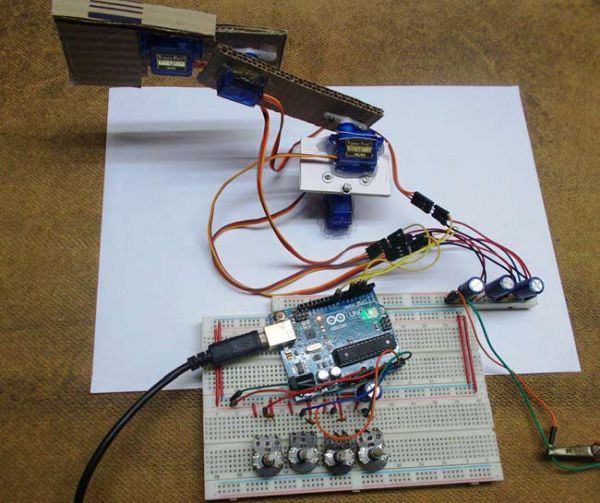
This Arduino Robotic Arm can be controlled by four Potentiometer attached to it, each potentiometer is used to control each servo. You can move these servos by rotating the pots to pick some object, with some practice you can easily pick and move the object from one place to another. We have used low torque servos here but you can use more powerful servos to pick heavy object. The whole process has been well demonstrated in the Video at the end. Also check our other Robotics Projects here.
Components Required:
- Arduino Uno
- 1000uF Capacitor (4 pieces)
- 100nF Capacitor (4 pieces)
- Servo Motor (SG 90- four pieces)
- 10K pot- Variable Resistor (4 pieces)
- Power Supply (5v- preferably two)
Servo Motor:
First we talk a bit about Servo Motors. Servo Motors are excessively used when there is a need for accurate shaft movement or position. These are not proposed for high speed applications. Servo motors are proposed for low speed, medium torque and accurate position application. So these motors are best for designing robotic arm.
Servo motors are available at different shapes and sizes. We are going to use small servo motors, here we use four SG90 servos. A servo motor will have mainly there wires, one is for positive voltage another is for ground and last one is for position setting. The RED wire is connected to power, Black wire is connected to ground and YELLOW wire is connected to signal. Go through this tutorial of Controlling Servo Motor using Arduino to learn more about it. In Arduino we have predefined libraries to control the Servo, so it is very easy to control servo, which you will learn along with this tutorial.
Construction of Robotic Arm:
Take a flat and stable surface, like a table or a hard card board. Next place a servo motor in the middle and glue it in place. Make sure the degree of rotation is in the area presented in figure. This servo acts as base of arm.
Place a small piece of cardboard on top of first servo and then place the second servo on this piece of board and glue it in place. The servo rotation must match the diagram.
Take some cardboards and cut them into 3cm x 11cm pieces. Make sure the piece is not softened. Cut a rectangular hole at one end (leave 0.8cm from bottom) just enough to fit another servo and at another end fit the servo gear tightly with screws or by glue. Then fit the third servo in the first hole.
Now cut another cardboard piece with lengths shown in figure below and glue another gear at the bottom of this piece.
Circuit Diagram and Working Explanation:
The circuit connection for Arduino Uno Robotic Arm is shown below.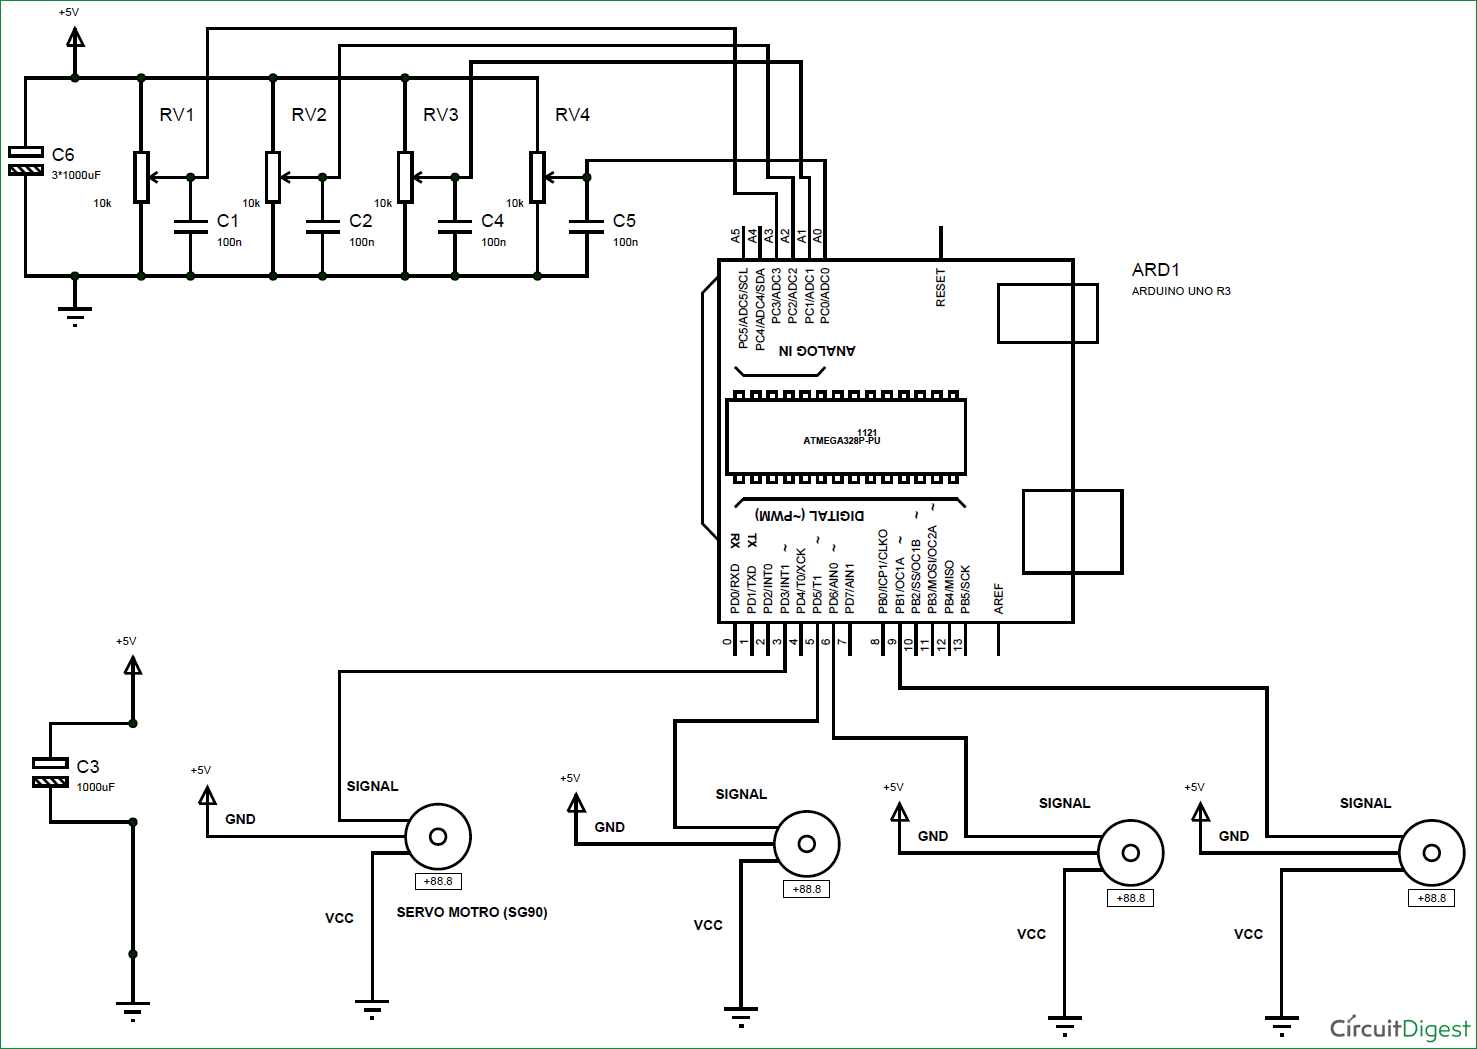
For more detail: Arduino Robotic Arm