Microcontrollers are good when it comes to brain, but to do anything in real world they need muscles too !
Their muscles are electromechanical actuators like motors.
Their are several types of motor available to do various type of motion. The simplest of them are DC motors. They can generate rotary motion and when wheels are attached to their shaft they can be used to move a body.
Applications include motion of a robot on flat surface like a floor.
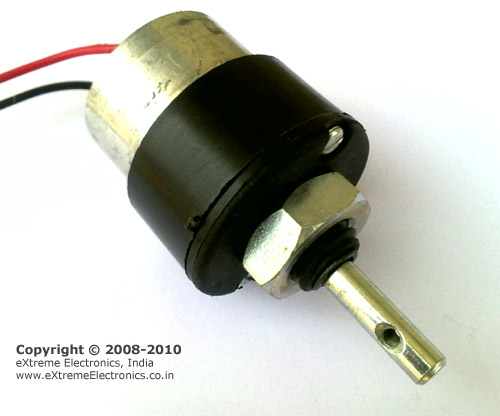 Normally a DC motors runs at a high RPM, so to slow it down a gear head is attached in front of it. This makes RPM come down to values such as 50 RPM to 500 RPM. This also increase the torque online casino no deposit generated by the motor.
In this tutorial we will learn the basics about these motors and how to control them using a microcontroller.
DC Motor Rotates in one direction when you apply power to its terminals. When you reverse the polarity of the supply it will rotate in opposite direction.
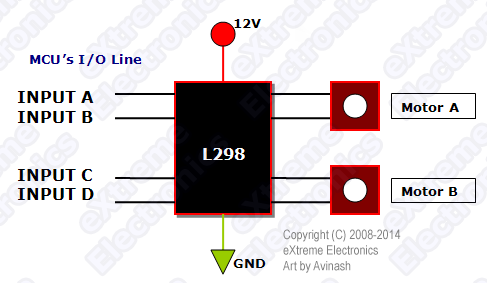
Since a DC Motor requires current in the range of 400ma to 1000ma we cannot supply them directly from the MCUs I/O Pins. We need some kind of driver circuit that can deliver more current to the motors. Also a MCU generally works off 5v supply but normal motors require a 12v (or 24v) supply. This circuit which is used to control a Motor from MCUs I/O line is called H-BRIDGE circuit. Many easy to use H-Bridge ICs are available, like the L293. One L293 IC has two H-BRIDGE circuits. So it can control 2 DC Motors.
Since this is our very first motor control program, we will keep it simple. Thus we will not control the speed of motor from MCU, we will be just controlling is rotation direction.
But our motor controller board support speed control too. So we have to disable it first.
Speed control is achieved by sending PWM signals from our MCU to EN1 line. Similarly their is an EN2 line for motor B.
To disable speed control we need to tie EN1 line permanently to the 5v supply.
To do this take a two pin jumper and short EN1 line with 5v out line.
For more detail: Simple Single Motor Control using AVR ATmega16
About The Author
Ibrar Ayyub
I am an experienced technical writer holding a Master's degree in computer science from BZU Multan, Pakistan University. With a background spanning various industries, particularly in home automation and engineering, I have honed my skills in crafting clear and concise content. Proficient in leveraging infographics and diagrams, I strive to simplify complex concepts for readers. My strength lies in thorough research and presenting information in a structured and logical format.
Follow Us:LinkedinTwitter