
Summary of Setup Arduino Software for Atmega328P with Internal Crystal on Breadboard
This article outlines setting up a bare-bones breadboard Arduino using an Atmega328P controller. It details downloading and installing the specific board configuration file, emphasizes the necessity of the "P" variant for compatibility, and recommends a BoostMicro power supply for stable voltage. The guide concludes by instructing users on locating their Arduino sketchbook folder to place the configuration text file.
Parts used in the Breadboard Arduino Project:
- Atmega328P controller
- Breadboard
- BoostMicro power supply
- Batteries
- Digital output pin
- Power connections
- Ground connections
- boards.txt configuration file
A breadboard Arduino will require an Atmega328P controller for these instructions. Note the “P” at the end of the name. You cannot use an Atmega328 because it has a slightly different device id number. It will require a different board configuration. Instructions for that are outside of this tutorial.

Go to the Arduino tutorial website to get the board file to add to your sketchbook folder, Breadboard Tutorial Site.
You download the file, Breadboard.zip. Unzip the text file, boards.txt. If it is not in a folder called “Breadboard”, then create the folder and move the text file into it.
The photo shows the ultimate bare bones system. Power, ground, and one digital out. Anything less and what is the point.
Please note the cool BoostMicro power supply. It provides a steady 5 volts even as the batteries drain. It is available from Amazon, BoostMicro – Assembled Link.
Go to the Arduino tutorial website to get the board file to add to your sketchbook folder, Breadboard Tutorial Site.
You download the file, Breadboard.zip. Unzip the text file, boards.txt. If it is not in a folder called “Breadboard”, then create the folder and move the text file into it.
The photo shows the ultimate bare bones system. Power, ground, and one digital out. Anything less and what is the point.
Please note the cool BoostMicro power supply. It provides a steady 5 volts even as the batteries drain. It is available from Amazon, BoostMicro – Assembled Link.
Step 1: Move the File to Your Sketchbook
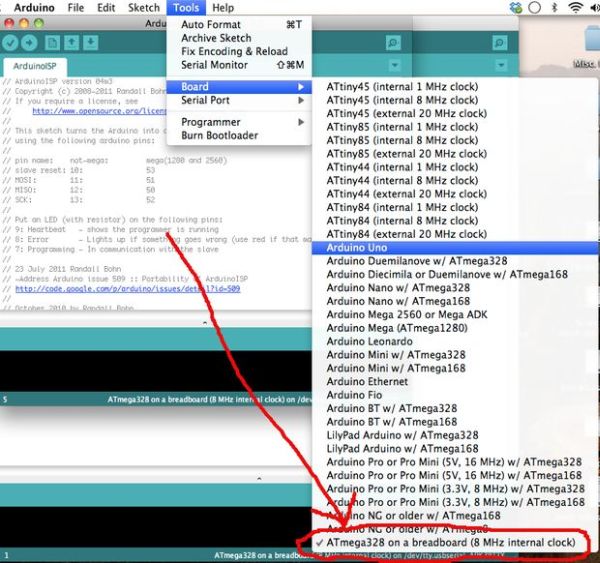
Find the sketchbook folder for your Arduino programs. This folder is usually listed in the preference menu. Go to the top toolbar, select Arduino, scroll down and pick Preferences… The popup window should show the file path to the sketchbook folder.
The photos shows how this would look on MacOSX and Windows XP.
The photos shows how this would look on MacOSX and Windows XP.
For more detail: Setup Arduino Software for Atmega328P with Internal Crystal on Breadboard
-
Which Atmega chip is required for this project?
You must use an Atmega328P because the standard Atmega328 has a different device id number. -
Where can I download the necessary board files?
The board file is available from the Breadboard Tutorial Site as a file named Breadboard.zip. -
How do I install the boards.txt file?
You must unzip the file and move boards.txt into a folder named Breadboard within your sketchbook directory. -
What is the minimum hardware setup shown?
The ultimate bare bones system requires power, ground, and one digital out connection. -
Why is the BoostMicro power supply recommended?
It provides a steady 5 volts even as the batteries drain. -
How do I find my Arduino sketchbook folder location?
Select Preferences from the top toolbar under the Arduino menu to view the file path.
