
Summary of Launch-Ready SSTV CubeSat
This article guides readers through building a CubeSat satellite capable of broadcasting live images using Slow Scan TV (SSTV) technology. It details the construction process, including 3D printing a durable enclosure, integrating a power system with solar charging and Li-ion batteries, configuring a Raspberry Pi Zero as the computing unit, and connecting a DRA818V radio module via serial port. The guide also covers enabling UART on the Pi and utilizing a PCB dipole antenna for transmission, emphasizing component accessibility despite pandemic-related challenges.
Parts used in the CubeSat Satellite:
- Arduino development boards
- Raspberry Pi Zero
- CubeSat form factor structure
- PETG or ABS plastic for 3D printing
- 3x18650 Li-ion batteries
- Solar energy panels
- Charge controller board
- DC-DC 5V USB converter
- Raspberry Pi Camera Module
- DRA818V radio module
- PCB Dipole antenna
- Software Defined Radio equipment (for ground station)
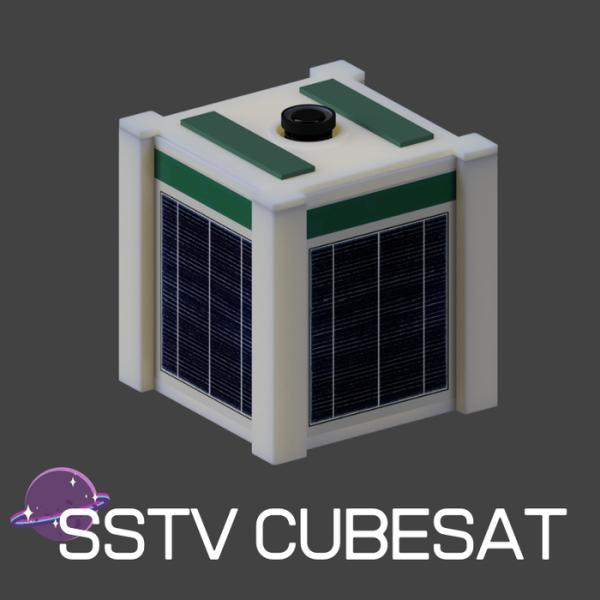
Satellites are man-made instruments that collect information and data from space. Humans have pioneered space technology over the years and space technology is more accessible than ever.
Earlier Satellites used to be very complicated and expensive but Now space technology is more accessible and affordable than ever.
Nowadays we can build a satellite quite easily using off-the-shelf components such as Arduino development boards or using Raspberry pi.
In this Instructable we will learn how to build a satellite that could broadcast live images.
For this satellite we will use a form factor known as CubeSat. A CubeSat (U-class spacecraft) is a type of miniaturized satellite for space research that is made up of multiples of 10 cm × 10 cm × 10 cm cubic units (source-wikipedia)
I aplologize for 3D renderings instead of real pictures since i was not able to find parts to complete the satellite amid the Covid-19 Pandemic.
OVERVIEW
-The satellite will use SSTV(Slow Scan TV) technology to transmit its Images to earth after which it will be picked up by a ground station(which will be equipped with Software Defined Radio which will be used to capture the transmitted data by the satellite)
—[More Information at https://en.wikipedia.org/wiki/Slow-scan_televisio…
Step 1: 3D Printed STRUCTURE
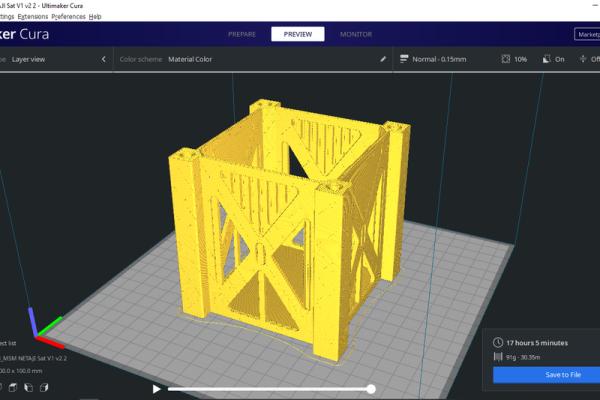
The Structure of the Satellite will enclose the electronics and securely protecting it. The Structure was designed in Autodesk Fusion 360* and can be 3D Printed
Note- The material used for 3D printing Should be tough and durable. The temperature in Space changes drastically [from about 121 C to -157 C] which will exert extreme structural stress on the structure. It is recommended to use Strong materials such as PETG or ABS.
It us recommended to use a Infill setting of 70-80%
Step 2: POWER SYSTEMS of Satellite
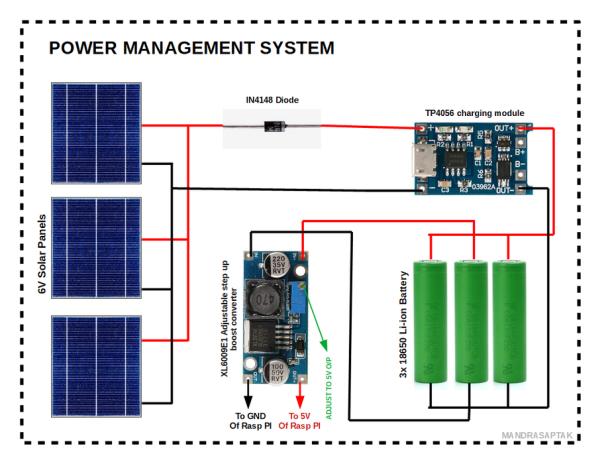
Power Management System
- The satellite will operate on 3×18650 Li-ion batteries which will be charged using solar energy under the supervision of a charge controller board to avoid damaging the batteries from overcharging.
- Then, the batteries will power the onboard computer(here, a raspberry pi zero) through a DC-DC 5V USB converter.
Step 3: Setting Up Raspberry Pi Zero(The Computing Unit)
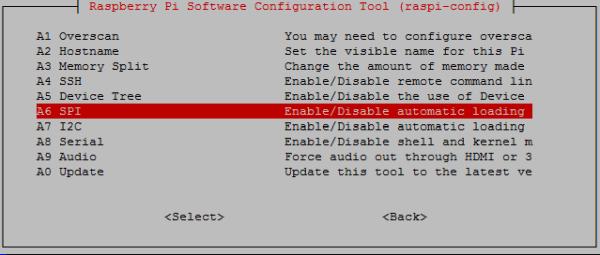
Step 1: First we have to install Raspbian OS with a graphical environment
Step 2:Then enable Camera interface(and also attach Raspberry camera module), I2C and Serial by accessing the raspi-config
Step 3:Then we have to Download the SSTV -Servet Repository from GitHub by Innovart Team (who also created the SSTV capsule instructable > https://www.instructables.com/id/SSTV-CAPSULE-FOR-… ) and save it to “/home/pi”
Step 4:Then execute the sstv.sh script to start capturing the pictures and then communicating with the radio module to transmit the picture(Do This After Finishing STEP -6)
Step 4: Wiring the Raspberry Pi
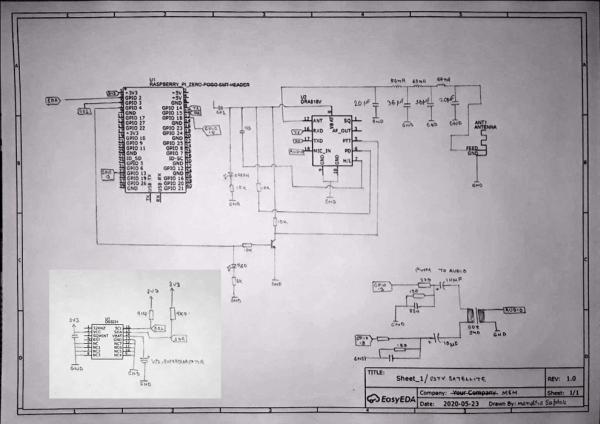
Connect the components according to the circuit diagram
Step 5: Radio Module
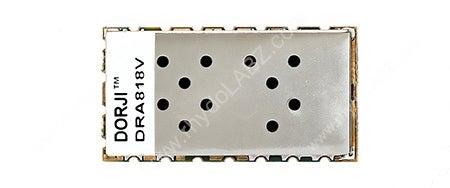
For this project DRA818V module was utilized. The RaspberryPi communicates with radio module via serial port, so we have to enable the GPIO pin
To enable the UART(GPIO) pin we have to enter the following code-
$ sudo -s
$ echo “enable_uart=1” >> /boot/config.txt
$ systemctl stop [email protected]
$ systemctl disable [email protected]
$ nano /boot/cmdline.txt #Remove console=serial0,115200
Then we have to reboot the raspberry pi and the GPIO pins are enabled
Now with the help of the established GPIO serial connection we can control the radio module and assign the transmitting frequency.
Now we have to setup the Transmitting SSTV frequency
Note- The frequency must match with the SSTV frequency allotted by your country
Step 6: Antenna
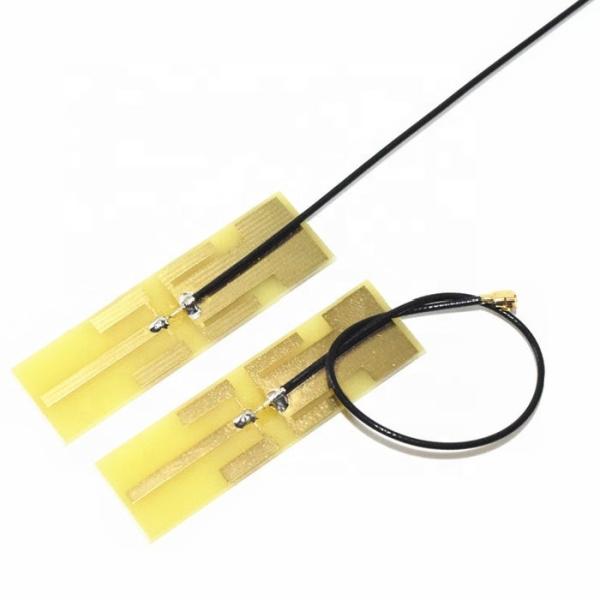
Due to the compact size of our project we will use PCB Dipole antenna. This maybe not the most efficient way to transmit but due to the very compact nature of the project we have no other choice. also Patch antennas also can be utilized but i have not found any commercial one easily available.
Source: Launch-Ready SSTV CubeSat
- What technology does this satellite use to transmit images?
The satellite uses SSTV (Slow Scan TV) technology to transmit images to earth. - How is the satellite powered?
It operates on 3x18650 Li-ion batteries charged by solar energy under the supervision of a charge controller board. - Which material is recommended for the 3D printed structure?
Strong materials such as PETG or ABS are recommended to withstand extreme temperature changes from about 121 C to -157 C. - How do I enable the UART GPIO pin on the Raspberry Pi?
You must edit the boot config file to enable_uart=1, stop and disable the serial-getty service, and remove console=serial0,115200 from cmdline.txt before rebooting. - What radio module is utilized in this project?
The DRA818V module is utilized, communicating with the Raspberry Pi via a serial port connection. - Can I use a Patch antenna instead of a PCB Dipole antenna?
Yes, patch antennas can be utilized, but the author notes they were not easily available commercially at the time. - What operating system must be installed on the Raspberry Pi?
Raspbian OS with a graphical environment must be installed first. - Why did the author use 3D renderings instead of real pictures?
The author was unable to find parts to complete the satellite amid the Covid-19 Pandemic.
