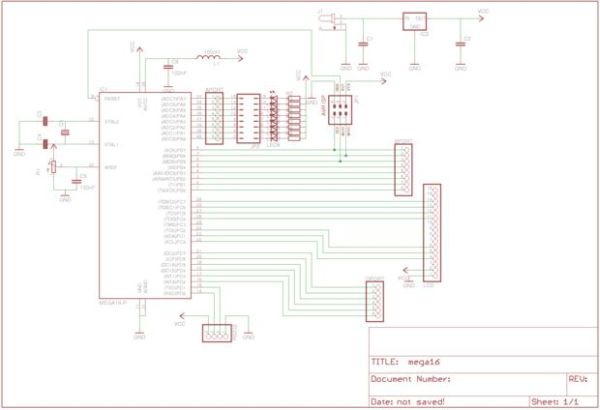
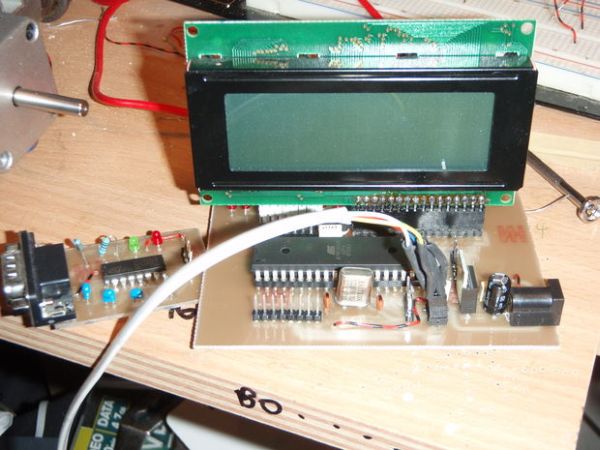
This instructable shows, how to do your own development board for Atmega16 or Atmega32 processors.The Internet is full of home made development boards, but I think that, there is room left for another one. This board have been very useful on my projects and I actually designed and made it to serve one of my project.
What it offers?
– ISP-connector.
– Adjustable reference voltage for AREF with trimmer.
– 8 leds connected PORTA with removable jumpers, so you can use leds also with another ports.
– Spike bars for PORTA, PORTB, PORTC and PORTD.
– Modified spike bar for LCD-screen (4 bit)
– rs232 serial port connector
– Removable rs232 module
– Regulated 5V
What you will need? (parts for main board)
– 1x Atmega16 or Atmega32 processor
– 1x crystal (It is your choice how many Mhz it will be)
– 2x 27 pF capacitors for crystal
– 1x 7805 voltage regulator
– 1x 47uF 16V capacitor
– 3x 100nF capacitor
– 1x DC-jack 2,1mm or 2,5mm (what ever you want use)
– 1x 1K potentiometer
– 8x led (any colour)
– 8x 330 Ohm resistors
– lot of spike bars
Parts for rs232 module
– Max232 IC
– 4x 0,1uF capacitors
– 2x led (green and red)
– 2x 330 Ohm resistors
– Spike bar
– D9-connector

Step 1: The Circuit Boards
 rs232.pdf(595×842) 10 KB
 mega16.pdf(595×842) 17 KB
 Eagle_schemas.zip325 KB
Step 2: Etching or Milling
There is two ways to make these boards, etching or milling. I’m not a chemist, so I used the last option. I made my mill from these great instructables, so If someone have also nc-mill and want to use it for make these boards, just let me know and I will send the G-codes.
For more detail: Atmega16/32 Development Board With LCD

