Summary of ATTiny44 Guitar Effector
This project is an ATTiny44-based digital guitar preamp/effect module with on-board audio processing, Bluetooth control, and programmability via the Arduino IDE. It requires CNC-milled PCB, SMD components (optional), 3D-printed snap-fit case, and a battery-powered enclosure. The build includes routing, soldering, adding audio connectors and potentiometers, programming the ATTiny44, and assembling components into the printed case for a portable, programmable guitar effector.
Parts used in the ATTiny44 Guitar Effector:
- LM386 (DIP or SMD)
- ATTiny44
- 4 x 10k resistors
- 1 x 1k resistor
- 1 x 255k resistor
- 1 x 5 ohm resistor
- 0.1 uF capacitor
- 2.2 uF capacitor
- 220 uF capacitor (external)
- 2 x voltage regulators
- 6-by-1 male connector (FTDI)
- 3-by-2 male connector
- 2 x 2-by-1 male connectors
- 2 x 3-by-1 male connectors
- 3-by-2 female connector
- 20 MHz crystal
- 9V battery connector
- 10k potentiometer (large, with knob)
- 1/4 inch male audio connector
- 1/4 inch female audio jack
- 1/8 inch female audio jack
- Sparkfun Bluetooth Silver Mate
- PCB substrate for CNC milling
- 3D-printed case (two snap-fit parts)
A DIY ATTiny44 based guitar preamp+effector. All the audio processing is done digitally on-board. So it is definitely not a HiFi system, but something you can definitely have fun programming. You can program the audio properties in Arduino IDE and create mobile apps that talk to the module for remotely controlling the effects.
This instructable project requires a milling machine to create the circuit as well as SMD components, but if anyone is looking for a more accessible option, please check out this Arduino based version: https://www.instructables.com/id/Arduino-Guitar-Ef…
Step 1: The Circuit: Preparation
The circuit for the effector will be made using a CNC milling machine. I used a Modela but anything similar will work. The list of material required will include:
- LM386 (I used a DIP chip but SMD will make it more compact, while the traces need to be changed)
- ATTiny44
- 4 x 10k resistors
- 1 x 1k resistor
- 1 x 255k resistor
- 1 x 5 ohm resistor
- 1 x 0.1 uF capacitor
- 1 x 2.2 uF capacitor
- 2 x voltage regulator
- 1 x 6-by-1 male connector
- 1 x 3-by-2 male connector
- 2 x 2-by-1 male connectors
- 2 x 3-by-1 male connectors
- 1 x 3-by-2 female connector
- 1 x 20 MHz crystal
There is redundancy in the schematics since I designed it for many other purposes. FTDI connection (6-by-1) is not very necessary since only two pins we need are Rx and Tx. If an SMD version of LM386 is used, the 3-by-2 female connectors are not necessary.
Components needed outside the circuit board are:
- 9V battery connector
- 10k potentiometer (a big one with a knob)
- 220 uF capacitor
- 1/4″ male audio connector
- 1/4″ female audio jack
- 1/8″ female audio jack
- Sparkfun Bluetooth Silver Mate
Step 2: The Circuit: Making the Circuit
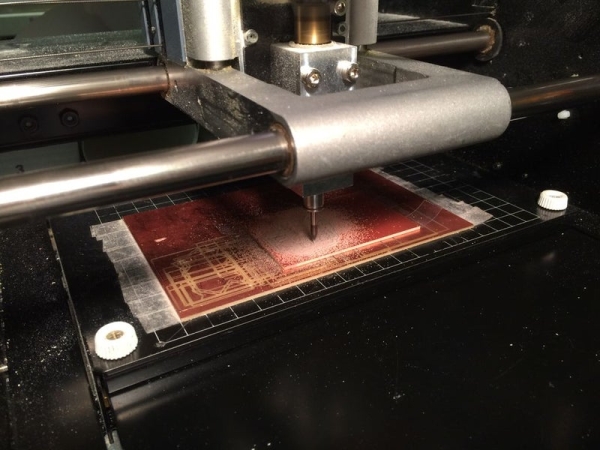
I used the png file above for routing the board. Depending on your setup, you will need to convert the file to machine code accordingly (eagle project for further modification is attached as well). In the png file, the outer border is through-cut, and the traces inside are only to remove the copper layer.
Note that there are two boards in the png file. The one in the left is the main circuit board with the microcontroller, where the one on the right is to have a separate voltage regulator for the Bluetooth module. It helps with reducing noise.
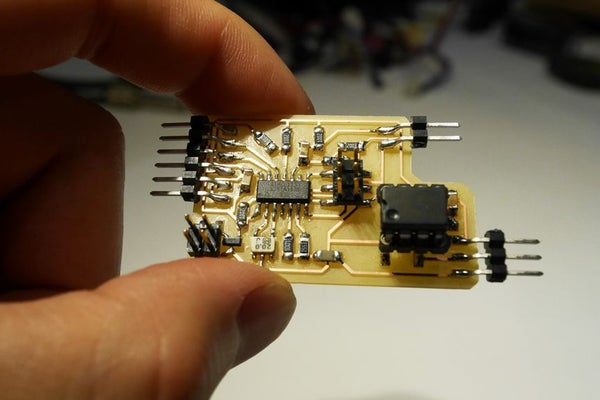
Once the circuit is completed, it is soldering time. The components placement can be found in the schematic (png or eagle) and in the picture above.
Step 3: The Circuit: Add Other Components

The final step for the circuit is to add audio connectors, a volume knob (potentiometer), a battery, and the Bluetooth module. The connections are illustrated above in the picture. I used female to female jumpers for the connection, but soldering cables directly to the circuit board (without connector pints) will make it more compact.
Note: I also added a capacitor between the knob potentiometer input and ground pins, and a potentiometer at the input stage for controlling volume. These are up to experiment and preference.
Step 4: Programming the Board
Download the arduino code and upload to your ATTiny44. Detailed instruction on how to program ATTiny can be found here if needed: http://highlowtech.org/?p=1695
Step 5: Printing the Case
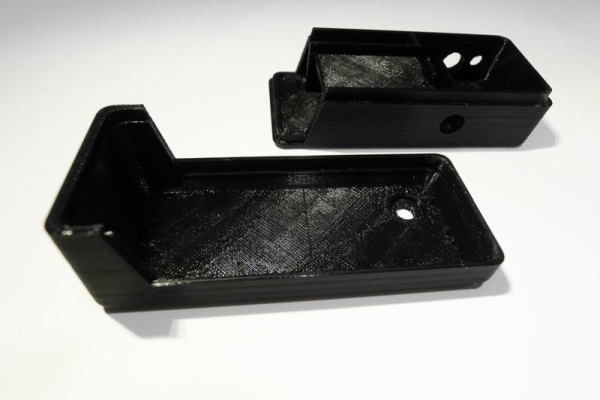
Two parts of the case slide and snap into each other. Very sturdy, and no hinges are needed. The STL files for the casing are attached below.
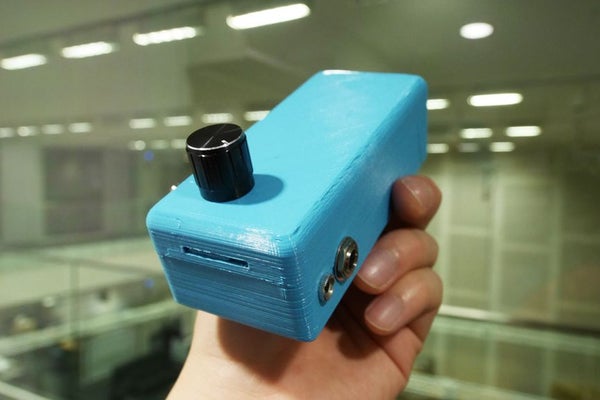
Step 6: Assembly
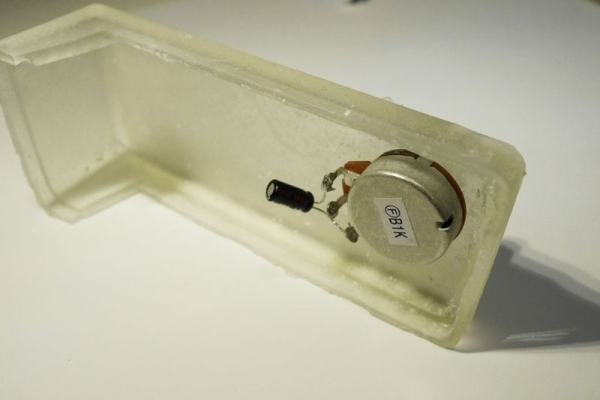
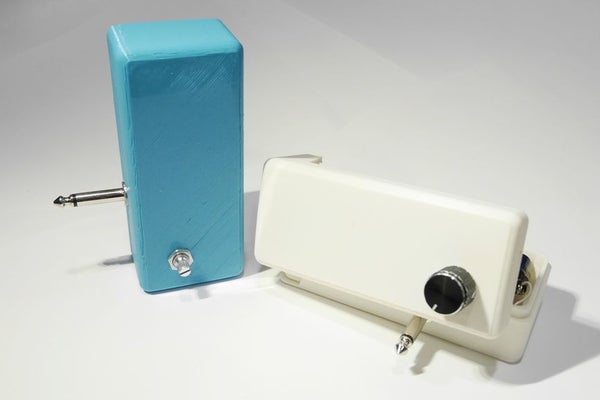
Now finally the time to put everything together. All components connected to the circuit board are either mounted or enclosed by the 3D printed case. The volume knob and three audio connectors are mounted, and the battery, the circuit board, and the Bluetooth module will be placed in inside compartments like the picture above.
Step 7: Done!
Now it’s time to play! Here are some more samples. To use the effector, plug in the effector to your electric guitar and a pair of headphones to the 1/4″ jack, and start playing. I built a simple openframeworks app that sends numbers to the effector so I can switch between presets. It simply makes a serial connection with the effector and sends a single integer.
Source: ATTiny44 Guitar Effector
- Do I need a milling machine to make the circuit?
Yes, the project uses a CNC milling machine to create the PCB traces as described. - Can I use SMD components instead of DIP for LM386?
Yes, an SMD version of LM386 can be used but the traces need to be changed and 3-by-2 female connectors may not be necessary. - What additional components are needed outside the PCB?
A 9V battery connector, 10k potentiometer with knob, 220 uF capacitor, 1/4 inch male and female audio jacks, 1/8 inch female jack, and Sparkfun Bluetooth Silver Mate are needed. - Is a separate voltage regulator used for the Bluetooth module?
Yes, a separate regulator board is included to help reduce noise for the Bluetooth module. - How do I program the ATTiny44?
Download the Arduino code provided and upload to the ATTiny44; the instructable links to detailed ATTiny programming instructions. - Are STL files provided for the case?
Yes, STL files for the two-part snap-fit case are attached in the project. - Can I control presets remotely?
Yes, the author built an openframeworks app that sends integers over serial to switch presets, and the module supports Bluetooth control. - Is the effector designed for HiFi audio?
No, the article states it is not HiFi but intended for fun programmable effects.