Summary of Bootload Your ATtiny85
This article explains bootloaders for microcontrollers, specifically the ATtiny85, enabling direct firmware uploads via the Arduino IDE without a separate programmer. It details ATtiny85 specifications, weighs the pros (easier prototyping) and cons (flash memory usage, startup delay), and provides step-by-step instructions to add board support to the IDE using a Snapduino package URL.
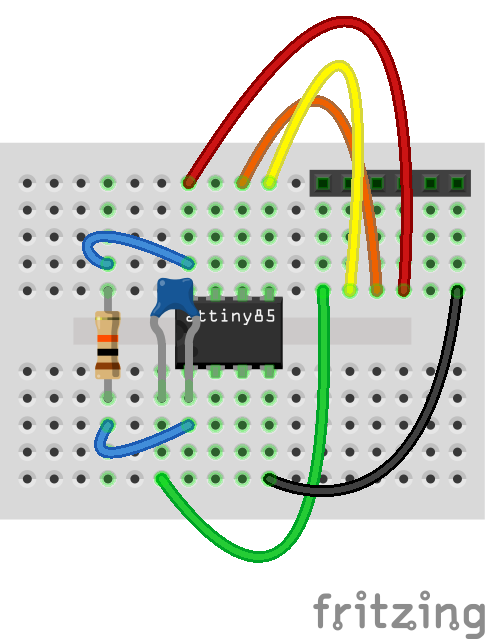
Parts used in the ATtiny85 Bootloader Project:
- ATtiny85 Microcontroller
- Arduino IDE
- Serial Port
- Programmer Device
- Snapduino Board Definition Package
Story
What is a Bootloader?
Microcontrollers require a programmer to install firmware on them. A programmer is a device, that when combined with software, loads firmware to the microcontroller. There are many programmers available. I won’t go into to detail about them, but I will say that if you intend to do more than just tinker with microcontrollers, you will want to invest in a programmer.
The Arduino IDE allows firmware to be loaded directly through a serial port by communicating to a piece of software already loaded on the microcontroller. This special software preloaded to the microcontroller is called a bootloader.
For more information, see the article “Bootloader Development“.
ATtiny85 Microcontroller
It is a good idea to have a basic understanding of the ATtiny85 microcontroller. In addition, there are many other ATtiny microcontrollers with varying features. Here is a summary of the ATtiny85 microcontroller features.
- 8 pins
- 8KB ISP flash memory
- 512-Byte EEPROM
- 512-Byte SRAM
- 6 general purpose I/O lines
- 32 general purpose working registers
- One 8-bit timer/counter with compare modes
- One 8-bit high speed timer/counter
- USI
- Internal and external Interrupts
- 4-channel 10-bit A/D converter
- Programmable watchdog timer with internal oscillator
- Three software selectable power saving modes
- DebugWIRE for on-chip debugging.
- The device achieves a throughput of 20 MIPS at 20 MHz and operates between 2.7-5.5 volts
For more information on this and other ATiny microcontrollers, see Atmel’s web site. This web site also contains detailed and summarized versions of the data sehhets for each microcontroller.
Why Use a Bootloader?
A bootloader makes prototyping easier because the code be loaed to the microcontroller dirctly from the Arduino IDE using a basic serial connection.
When I program my ATtiny85, I have to pull it out of the circuit and insert it into my programmer. When it finishes loading the firmware, I pull it out of the programmer and then place it back into the circuit. I may repeat this process several times. At the very least, it gets old, but many times I have bent pins and had to straighten them out with a pair of needle-nose pliers.
With a bootloader, I can program my ATtiny85 while still connected to the circuit.
There are some occasions where the components in the circuit you are building may interfere with the upload process.
Why Not Use a Bootloader?
The first, and primary reason, not to use a bootloader has to do with flash memory. Since a bootloader is firmware, it will use some of the flash memory on your microcontroller. The amount of memory it occupies may or may not be significant to you, but memory is tight, so pay attention to how much you are using.
The ATTiny85 has 8K (8,192 bytes) of flash memory for the code. The firmware will use 576 bytes leaving 7,616 bytes for your sketches (the firmware used in this project can be found at https://github.com/TCWORLD/ATTinyCore).
The second reason has to do with performance. A bootloader runs when the microcontroller is powered up or reset. This takes time due to the bootloader checking for an attempt to load new firmware. after the check, the bootloader starts the firmware you uploaded from the Arduino IDE. This process takes a few seconds to run resulting in delay before your firmware starts. Again, this may or may not be a significant issue for you, but you need to be aware of it.
I find the best balance is to use the bootloader while prototyping, and then, when creating the final project, burn your firmware to the microcontroller using a programmer.
Adding the Support to the IDE
If you are not familiar with adding a board to the Arduino IDE, the details are shown below. For additional information, see this article on Adafruit.
The first step is to add a URL to the Additional Boards Manager option in Preferences. Select Preferences from the File menu and add the URL shown below to the text box. If there is more than one URL in the box, separate them with a comma.
https://raw.githubusercontent.com/porrey/Snapduino/IDE/package_porrey_snapduino_index.json
In this project I am using the board definition for my Snapduino.
The second step is to install the board. In the Arduino IDE, click the Tools menu and then click Board. In the menu that appears, select Boards Manager. In the search text box type Snapduino to find the board package. Now click the Install button to install the board.
Change the name of the Board
If you do not like the name of the board in the IDE (you are probably not using Snap Circuits), the name can be changed manually to anything you like. Follow the steps below to change the name of the board in the Arduino IDE menu.
For more detail: Bootload Your ATtiny85
- How does the Arduino IDE load firmware?
The IDE loads firmware directly through a serial port by communicating with software preloaded on the microcontroller called a bootloader. - What are the main advantages of using a bootloader?
A bootloader makes prototyping easier by allowing code loading while the microcontroller remains connected to the circuit. - Why should I avoid using a bootloader?
Bootloaders consume flash memory and introduce a startup delay as they check for new firmware before running the user sketch. - How much flash memory does the ATtiny85 have?
The ATtiny85 has 8K or 8,192 bytes of flash memory available for code storage. - How do I add board support to the Arduino IDE?
Add the specific GitHub URL to the Additional Boards Manager option in Preferences and then install the board package via the Boards Manager menu. - Can I change the name of the board in the IDE?
Yes, the board name can be changed manually to anything you like within the IDE menu settings. - What is the best balance for using a bootloader?
Use the bootloader during prototyping and burn the firmware directly using a programmer when creating the final project.