Summary of Cardboard Dragon Robot
This article details the construction of a fully functional cardboard dragon robot controlled by a Micro:bit and a thumbstick. The project utilizes specific cardboard cutting techniques, such as exposing corrugation for curved joins, to create articulated body parts including a moving neck, jaw, tail, and wings. Electronics include servos, LEDs for eyes and fire, and an expansion board powered by batteries.
Parts used in the Cardboard Dragon Robot:
- 3 Micro Servos
- 3 Servo extension wires (approx. 20 inches)
- 1 Micro:bit board
- 1 Expansion board (Crazy Circuits Bit Board or HummingbirdBit board)
- 1 Thumbstick controller (or Hummingbird Joystick)
- 3 LEDs (two red for eyes, one yellow for fire)
- Jumper wires (Female to male or Female to alligator clip)
- Screwdriver
- One brad
- Hot Glue gun
- Small cardboard box (approx. 6.75 x 4.25 x 3.5 inches)
- Lots of cardboard (shipping box and extras)
- Cardboard cutting tools (box cutter, X-acto knife, etc.)
- Optional aluminum foil or bubble wrap
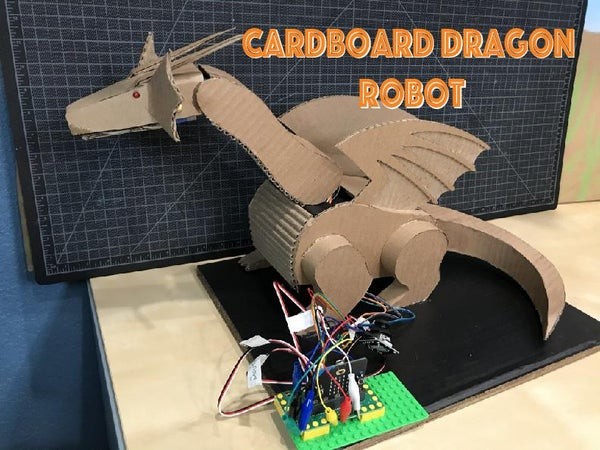
Who doesn’t love dragons? I know I do. I wanted to challenge myself with this project and build it all out of cardboard practicing some techniques I recently learned, and control it using a small thumbstick controller.
Supplies:
For this build, you will need:
-3 Micro Servos. I used this size to keep the whole project a manageable size, but feel free to use bigger servos if you prefer. I used the round servo horns that come with the servos.
-3 Servo extension wires. I used ones that are about 20 inches (50 cm) long.
-1 Micro:bit board
-One expansion board for the Micro:bit, in this case, I used a Crazy Circuits Bit Board from Brown Dog Gadgets with a 2 AA battery holder and a micro USB cord. I also used their Lego baseboard and a couple of legos to hold the Bit Board. EDIT: After further testing, I recommend using the HummingbirdBit board instead. It makes the whole thing more portable since you can just have one 4AA battery pack and the servo control is smoother.
-One Thumbstick to control your robot. These little things are cheap and you get what you paid for, but they are still fun to try. EDIT: After further testing, I found the Hummingbird Joystick to be better than the cheap thumbstick I used before.
-3 LEDs. Two for the eyes (I chose red 5m ones) and one for the fire in the mouth (I chose a gumdrop yellow one)
-If you are handy with wire and soldering iron, you can use that to wire the LEDs. But if you rather not use that, I recommend Female to male jumper wires that will let you connect to the LEDs. For connecting with the Bit Board I used female to alligator clip wires.
-Screwdriver to secure the servo horns.
-One brad
-Hot Glue gun.
-One small cardboard box. I used one that was about 6.75 x 4.25 x 3.5 inches (17 x 11 x 8.5 cm). I built the whole dragon around this box, so I chose one that was the size I pictured the body being.
-Lots of cardboard. I re-used a whole shipping box that was about 16 x 11 x 12 inches (40 x 28 x 30.5 cm) and some extra for the base. For the cardboard cutting techniques that I’ll be explaining, it is important to find cardboard that is easy to peel the layers from, otherwise, it’ll be extra hard to do.
-Cardboard cutting tools. My favorite is this box cutter, but I use a range of things from Canary cutters, to x-acto knives, to cardboard shears. Whatever you can be safe and comfortable using, have at it.
-Optional: Small piece of aluminum foil or aluminum bubble wrap to line the inside of the mouth and make the “fire” stand out more.
Step 1: Getting Started and Cardboard Building Techniques
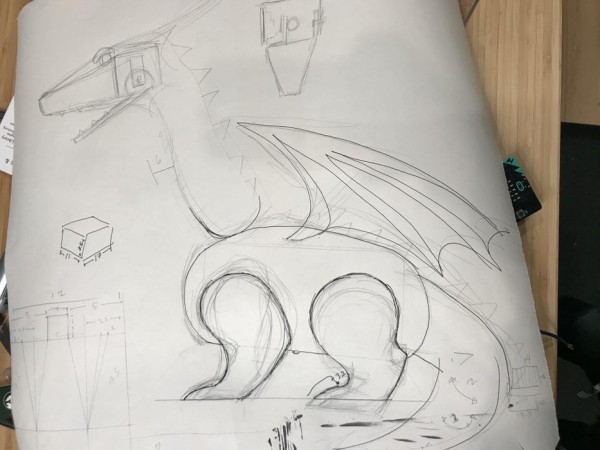
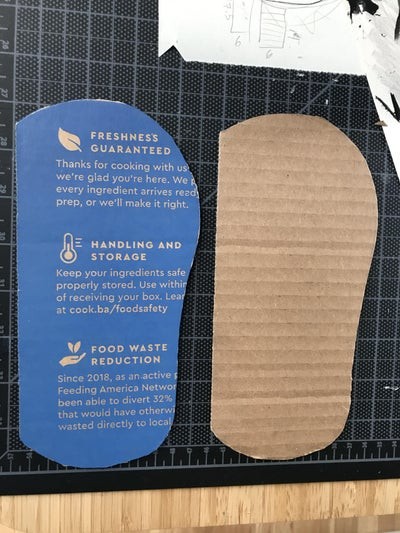
Like I mentioned in the supplies, I planned the whole project based on the small cardboard box I had. I traced the box onto a piece of paper and drew the dragon as I pictured it based on those proportions. All the measurements I used were based on the size of the box.
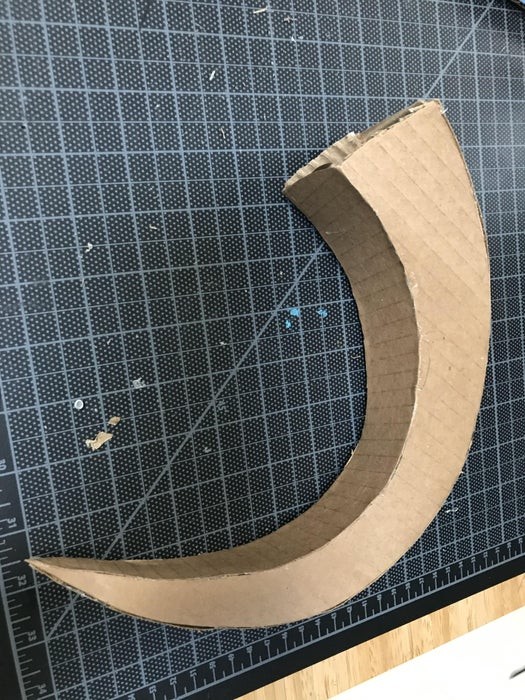
As far as cardboard building techniques go, I used some I learned recently that all center around the idea that if you are joining two pieces of cardboard, especially if one of the parts has curves, you first expose the corrugation of the cardboard by tearing off the top layer of the cardboard. (This is easier in some pieces of cardboard than others, so you can test this first). You then cut up the next layer, the corrugation only, in a line as thick as the cardboard is thick. Then you can glue this onto the other piece following the curvature of the cardboard because of the exposed corrugation. This will be clearer in the next steps.
Step 2: Rough Body and Neck
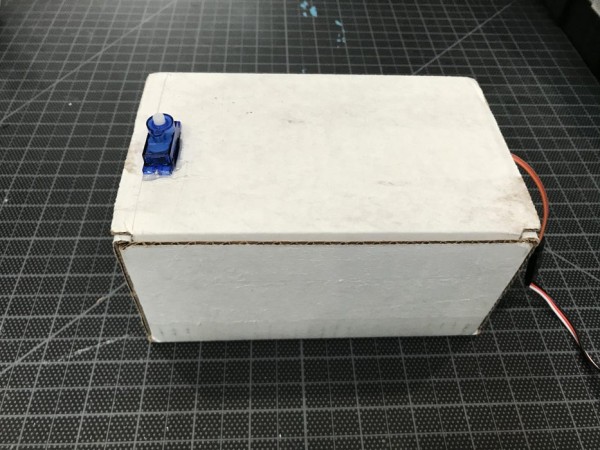
For the body, you need to make a hole at the edge of your small box, trying to center the pivot of the servo to the center of the body. The hole needs to be big enough for the servo but snug enough to have it not move around. You can always add a dab of hot glue to keep it in place. (I realized that part of the box would show once I finished the dragon, so I painted it black.)
Add the round servo horn and screw it in with the screws that came with the servo. This is important because the weight of the neck will make this fall off unless it’s secured.
Hot glue a second servo to the first one. I added a small piece of cardboard to keep it more level because the screw added a bump. The first servo will control the neck side to side and the second up and down.
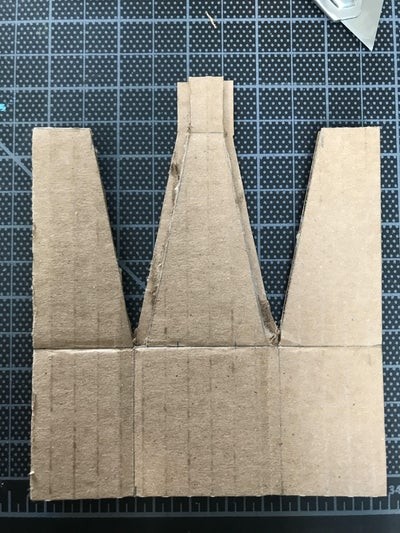
For the neck I made four parts, mirroring the side of the neck to have two of the side and then prepping the top and bottom of the neck cardboard by stripping the top layer. I determined the thickness of the neck by checking how long it was from the center of the first servo horn to the tip of the second servo horn and doubling that so it would be symmetrical on the other side.
Using the cardboard building techniques, I glued each piece separately. I wanted the front of the neck to be ribbed, so for that side, I used the prepped cardboard side up.
Step 3: The Head
The head of the dragon has two parts: the top part that will be most visible and can be decorated and the jaw that will be able to open and close.
I tried to simplify the design of the head by making it very angular.
The jaw requires that the servo horn connects to one side and the other side has to be against the side of the head connected with a brad to make the mouth open and close smoothly. In my quick schematic, you can see that the jaw is not symmetrical because it needs to account for the servo which sticks out on the side of the head as well as on the inside.
Once I have the basic parts of the head, I added the holes for the LED eyes and the hole for the servo then glued the top part. In the jaw part, I glued the servo horn and attached it to the servo, and then attached the other side with the brad through a hole.
For decoration and to hide the servo sticking out on the side of the head, I added frills to the dragon and some horns.
You can see the jumper wires sticking out of the LEDs. For the LED in the mouth, I went a little crazy and actually pushed the jumper wires through the wholes in the corrugation and bent it so it would be centered.
At this point, I test all the electronics to make sure everything is working well, I put the wires of the head through the neck so I can access them all together. Then glue together the head and the neck.
Step 4: Body and Legs
At this point, we can start giving the body more shape. I made two pieces mirrored that will be glued to the side of the box. To make them I traced the box to the cardboard then added more curves to make it more organic.
I also made the legs having two different pieces for the front and the back and then duplicating and mirroring them. In the end, there will be 4 pieces for the front leg and 4 for the back. Using the cardboard building technique, I make the legs 3D.
The wires are ready to go through the body. I can’t stress this enough: LABEL your wires. Servo connectors all look the same and it will save you some trouble if you know which servo wire goes to which servo.
Although at this point I made the legs, I don’t want all the weight of the dragon on them, so I added some cardboard wedges at the bottom of the dragon and painted them black so they would not show. They are made bigger on the front to tilt the whole dragon backward.
Then the legs are ready to be glued on.
I again test all the electronics, because the more I build, the harder it will be to access the cords until it will be impossible.
Step 5: Tail and Wings
I wish I had taken better photos of the making of the tail, but basically, the top and bottom layers are the same sizes, then the side on the inside of the curve is smaller than the one outside the curve. I did not worry about the end that will be connected to the body looking pretty because I knew it would be hidden by the body.
For the top of the body, I again made a strip of cardboard that I exposed the corrugation of. To that, I made a hole for the tail and pushed it through.
Before attaching the tail and the top of the body I made the wings. I struggled with the size. They could not be too big because they could end up getting in the way of the movement of the neck, but making them too small looked comical. For the webbing of the wings, I tore off the top layer and the corrugation so it would just show the smooth bottom layer.
Gluing the wings in place first, I then started gluing the top of the body, leaving a gap for the neck to move freely (which is why I had painted the box black).
For the front of the dragon, I added cardboard with exposed ribbing to match the neck.
Then to make it all more maneuverable, I added a base that was painted black and glued the dragon to it.
Source: Cardboard Dragon Robot
- What is the recommended expansion board for better portability?
The HummingbirdBit board is recommended because it allows for a single 4AA battery pack and provides smoother servo control. - Can I use larger servos instead of micro servos?
Yes, you can use bigger servos if you prefer, though micro servos were chosen to keep the project a manageable size. - How do I join two pieces of cardboard with curves?
You must expose the corrugation by tearing off the top layer, cut the corrugation only in a line matching the cardboard thickness, and then glue it to follow the curvature. - Why did I paint the small cardboard box black?
The box was painted black because part of it would show once the dragon was finished, and it helps hide gaps for neck movement. - How should I connect the LEDs if I cannot solder?
You can use female to male jumper wires, specifically female to alligator clip wires for connecting with the Bit Board. - What technique makes the legs look 3D?
Using the cardboard building technique where the top layer is stripped and the corrugation is cut allows the leg pieces to be glued into a 3D shape. - Why are cardboard wedges added at the bottom of the dragon?
They prevent the weight from resting on the legs and tilt the dragon backward to make it stable. - How do I ensure the mouth opens and closes smoothly?
The jaw connects to a servo horn on one side and uses a brad through a hole on the other side against the head.