This is a device that indicates by buzzing whenever the door crosses the specified distance giving a red light indication.This has been developed by linkit one board received in the giveaway! Its total cost is ~63$ including ~60$ linkit one board.Here’s video of it in action :-
Step 1: Things Required
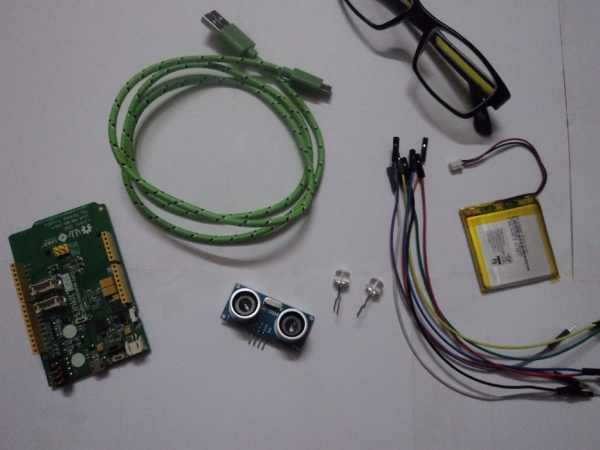
We need:-
- Linkit one
- USB cord
- 8 Jumper wires (male to female)
- L.E.D red
- L.E.D all except red color
- Buzzer
- Battery (optional)
- Hc-SR04 ultrasonic distance sensor
Step 2: Connecting Jumper Wires
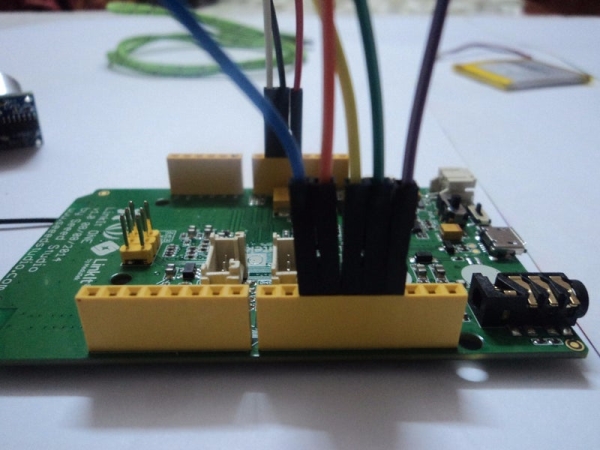
We need 8 jumper wires ,connect them all to the male ports of sensor ,leds and buzzer.
- Connect positive terminal of red l.e.d to digital pin 11 and other to gnd
- Connect + terminal of other led to digital pin 10 and other to gnd
- Connect +ve terminal of buzzer to digital pin 9 and other is to be taken common with red L.E.D’s negative as we have less gnd ports.
- Connect echo to digital pin 12
- Connect trig to digital pin 13
- Connect Vcc to +5 pin (positive supply)
- Connect gnd to gnd (negative)
Step 3: Code
This is the sketch of it.
Some code and wiring inspired by http://en.wikiversity.org/wiki/User:Dstaub/robotcar */
#define trigPin 13 #define echoPin 12 #define led 11 #define led2 10 #define buzzer 9
void setup() { Serial.begin (9600); pinMode(trigPin, OUTPUT); pinMode(echoPin, INPUT); pinMode(led, OUTPUT); pinMode(led2, OUTPUT); pinMode(buzzer, OUTPUT); }
void loop() { long duration, distance; digitalWrite(trigPin, LOW); delayMicroseconds(2); digitalWrite(trigPin, HIGH); delayMicroseconds(10); digitalWrite(trigPin, LOW); duration = pulseIn(echoPin, HIGH); distance = (duration/2) / 29.1; if (distance < 50) { digitalWrite(led,HIGH); digitalWrite(buzzer,HIGH); digitalWrite(led2,LOW);
}else { digitalWrite(led,LOW); digitalWrite(buzzer,LOW); digitalWrite(led2,HIGH); } if (distance >= 200 || distance <= 0){ Serial.println(“Out of range”); } else { Serial.print(distance); Serial.println(” cm”); } delay(800);
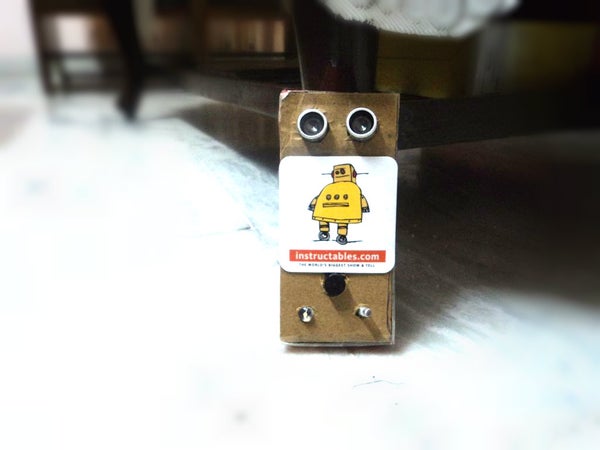
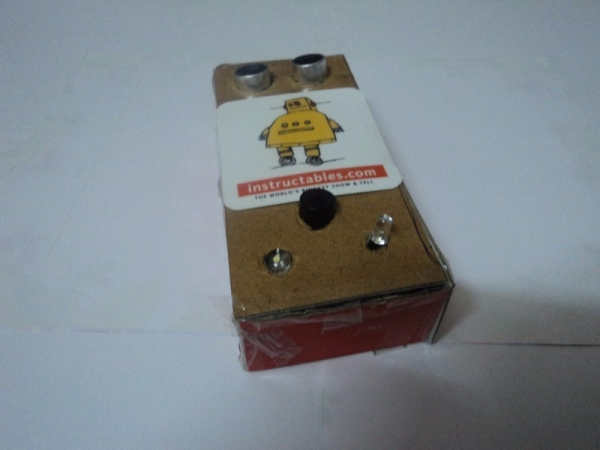
Step 4: Making Enclosure
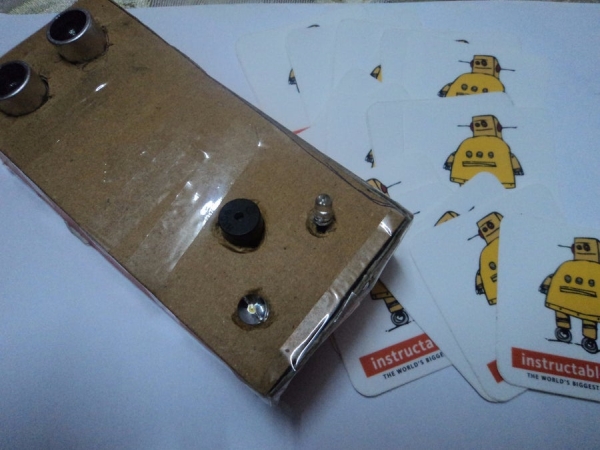
Make a small box in which the setup can fit easily and then insert all the components to the box holes and also paste an instructables robot sticker from your pile.
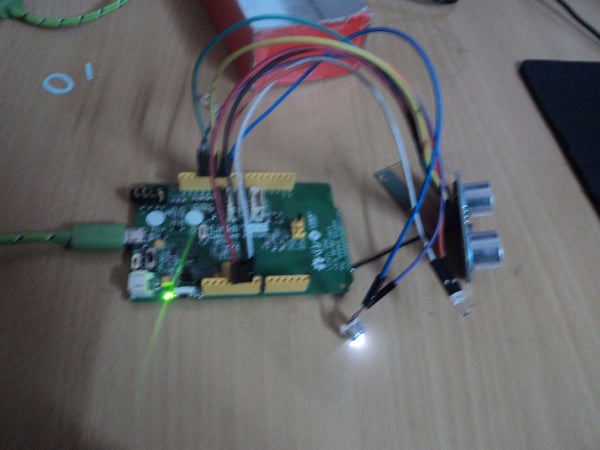
Step 5: Test!

Test it by using battery or simply use charger output that is too 5 volts! Check if buzzer and red led are working simultaneously and also if the white l.e.d turns ON whenever there is noting in between.If it is OK,then congratulations! The l.e.d s may appear a little dull that’s why I used a dark place for demonstration!
Step 6: Done!
Stick it on the wall adjacent to door of room which you think has important valuables in it.You can change the distance of reaction by changing the value of 50 in the code.It is in cms.You can check the distance in serial monitor giving an estimate of it.
I hope you enjoyed!
Thank you!
Source: Door Open Alarm With Linkit One