For my first IoT project I wanted to build a Weather Station and send the data to data.sparkfun.com.
Small correction, when I decided to open my account in Sparkfun, they were not accepting more connections, so I choose another IoT data collector thingspeak.com.
Continuing…
The system will be placed on my balcony and will retrieve temperature, humidity and air pressure. The microcontroller selected for this project is the FireBeetle ESP32 IOT Microcontroller supplied by DFRobot.
Please check DFRobot wiki page for more info regarding this microcontroller and how to upload the code using Arduino IDE.
All the physic parameters are given by the BME280 sensor. Also check the wiki page for some more info.
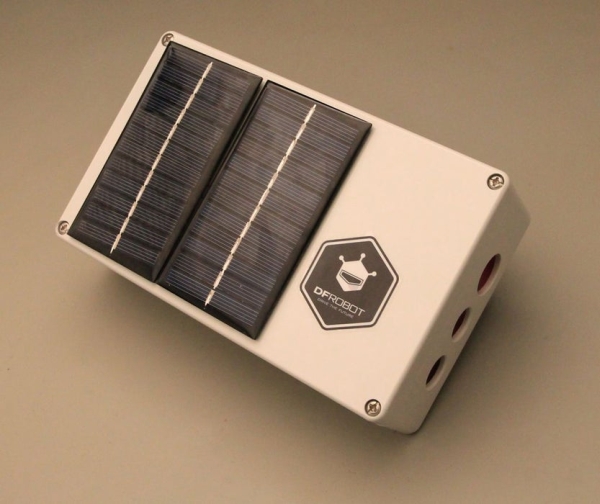
To turn the system completely “wireless” the power necessary is provided by two 6V solar panels that can deliver 2W of power. The cells will be connected in parallel. The energy produce is then be stored in a 3.7V Polymer Lithium Ion Battery with +/- 1000mAh capacity.
The Solar Lipo Charger module from DFRobot will be responsible for the energy management.
Step 1: Components
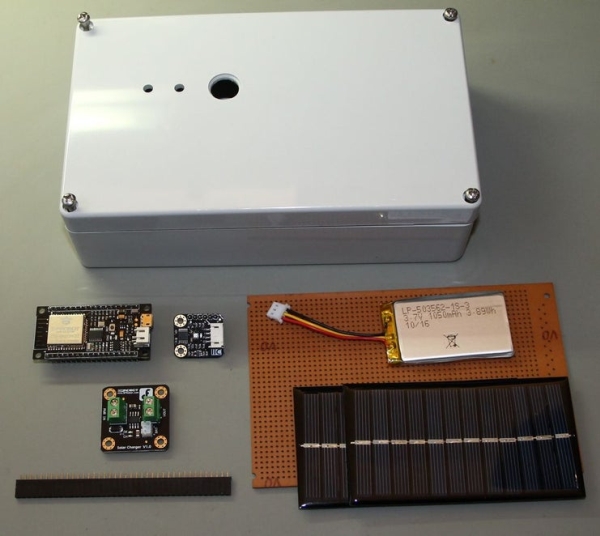
For this project you will need:
- 1x – DFRobot FireBeetle ESP32 IOT
- 1x – DFRobot Gravity – I2C BME280
- 1x – DFRobot 3.7V Polymer Lithium Ion
- 1x – DFRobot Solar Lipo Charger
- 2x – 6V 1W Solar Panel
- 1x – Perfboard
- 1x – Female Header
- 1x – Enclosure/box
- Wires
- Screws
Also you will need the following tools:
- Hot glue gun
- Soldering iron
- Drilling machine
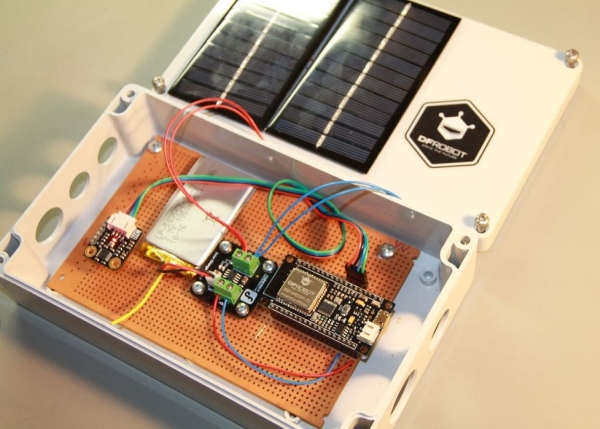
Step 2: Assembly
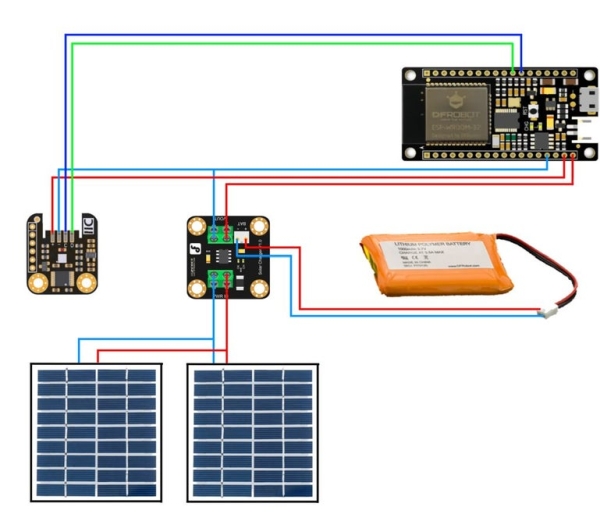
The FireBeetle ESP32 IOT Microcontroller is powered by the 3.7V battery that is connected to the Solar Lipo Charger in the battery input port. The solar cells are connected in the PWR In ports. The Vcc and GND ports of the FireBeetle ESP32 IOT Microcontroller are connected to Vout ports of the Solar Lipo Charger.
The BME280 power is supplied by the 3.3V port in the FireBeetle ESP32 IOT Microcontroller. The communication is done trough the I2C lines (SDA / SCL).
To fix all components in the box I used a perfboard, some headers and wires.
For the solar cells, I just used hot glue to fix them in the top cover of box. Since the box already had holes, no need to do more 🙂
Note: Diodes should be placed in the solar panels to avoid damaging them and discharging the battery.
You can read more about it in:
https://www.instructables.com/community/Use-of-diodes-when-connecting-solar-panels-in-para/
Step 3: Code
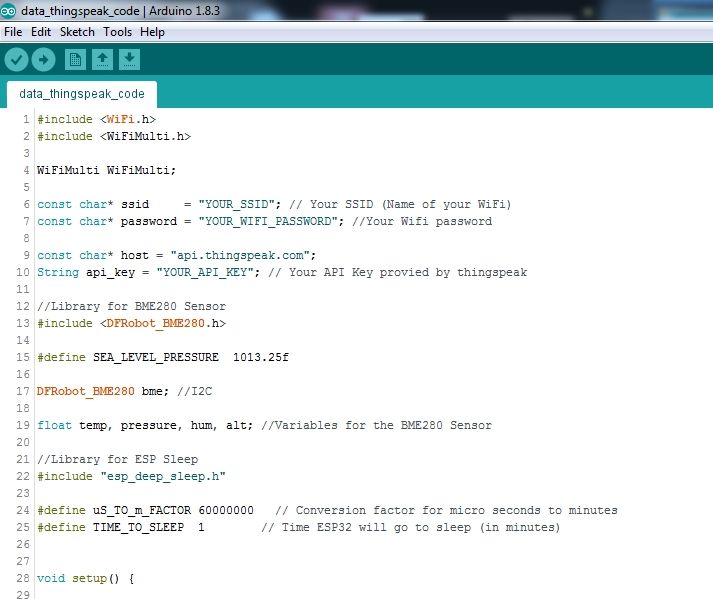
For you to use my code, some changes are necessary.
The first one is defining your wifi network name and password. The second is getting an API Key from Thingspeak.com. I will explain it below. Also you can define a new sleeping interval, if you wish so.
Thingspeak.com
If you do not have a Thingspeak account, you will need to go to www.thingspeak.com and register yourself.
After your email is verified, you can go to Channels and create a new channel. Add the variables that you want to upload. For this project, Temperature, Humidity, and Pressure.
Scroll down and press “Save Channel”. After this you can click in API Keys. And retrieve the the API write key. Then add it in your code file.
If everything is correct, your Weather Station can start sending data to your channel.
Step 4: Conclusion
As always in my projects I will to give room for future improvements, this is not different.
During the development, I start getting concern with the energy consumption of the system. I already place the ESP32 and BME280 to sleep and even so I have a consumption of around 2mA!!! Being the BME280 the big responsible for this, I will probably need a switch to turn off completely the module during sleeping mode.
Another interesting feature would be to retrieve the battery voltage. After some investigation and testing of some internal functions of the ESP32 nothing worked. So probably I will add a voltage divider and connect it to an Analog Input and read directly the voltage. Please let me know if you come up with a better solution.
Please write me if you found any mistake or if you have any suggestion/improvement or questions.
“Do not get bored, do something”
Source: ESP32 Solar Weather Station