In this instructables, we give a simple example of how to add voice output and distance sensing on everyone’s beloved robot with MediaTek LinkIt ONE.

Step 1: Materials
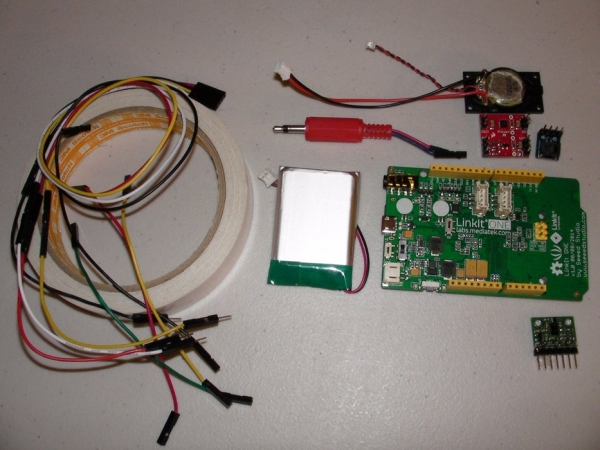
1. Linkit One with Battery
2. Mono Audio Amp Breakout with speaker
3. VL6180X Time-of-Flight Distance Sensor Carrier with Voltage Regulator
4. audio connectors: JST-PH 2-Pin SMT Right Angle Breakout Board, mono audio plug
5. Double coated tissue tape, jumper wires
6. your beloved robot!
Step 2: Adding Voice
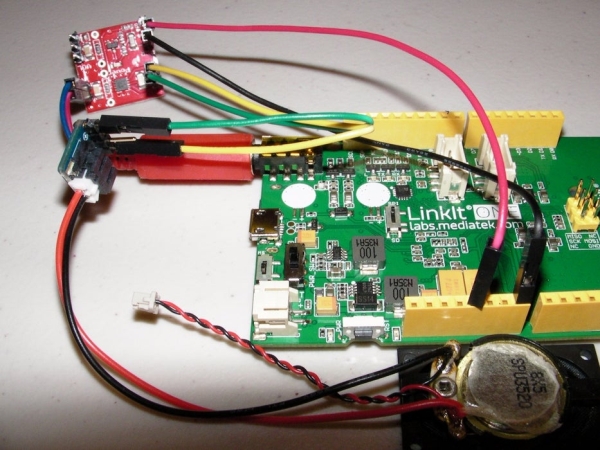
LinkIt ONE comes with audio output through onboard audio jack. For size and power considerations we use a notebook spare part micro speaker with an audio amplifier breakout. The steps are:
1. Connect LinkIt ONE audio jack to the audio plug to the input pins of audio amplifier breakout with jumper wire, soldering may required on the audio plug.
2. Connect 3.3V and GND on LinkIt ONE to audio amplifier breakout for powering the amplifier.
3. Connect the micro speaker to the output pins of audio amplifier breakout with proper connectors, here we soldered a JST 2-pin cable on the speaker, and use a JST-PH 2-Pin SMT Right Angle Breakout Board in between.
4. Google and download sound clip file of your favorite robot, you may need convert file format with some free online audio file format converter.
5. Set the switch beside the micro USB of LinkIt ONE to “MS”, connect LinkIt ONE to your computer with USB, LinkIt ONE will appear as a removable device. Copy the sound clip file to LinkIt ONE with proper filename and file extension.
6. Disconnect LinkIt ONE from your computer and set the switch beside the micro USB of LinkIt ONE back to “UART”.
7. Connect LinkIt ONE to your computer and run Arduino IDE, set the Tools->Board to LinkIt ONE, and set proper Port. Open File->Examples->LAudio->AudioPlayer.
8. Copy the line containing LAudio.playFile command to first line inside void loop() function, change the proper file name, and add delay(5000); after the playFile command.
9. Compile and upload code see if the sound clip is playing from the speaker.
Step 3: Adding Sense
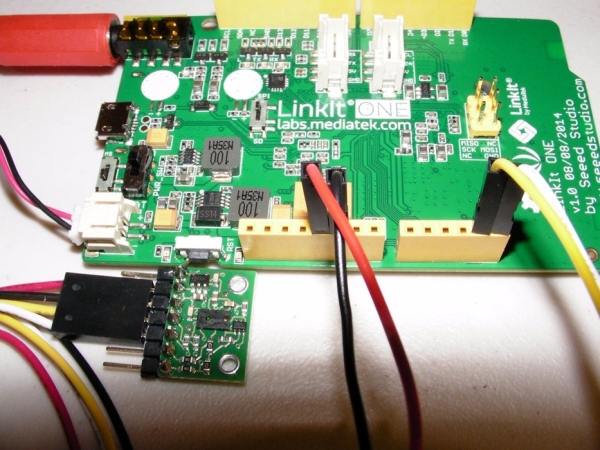
LinkIt ONE comes with various GPIO, for wiring simplicity we use a VL6180X Time-of-Flight Distance Sensor Carrier with Voltage Regulator via I2C. The steps are:
1. Connect the 5V and GND of LinkIt ONE to VL6180X.
2. Connect the SDA and SCL of LinkIt ONE to VL6180X.
3. the reading of VL6180X will vary from 10~255 for a max distance about 20cm.
4. goto https://github.com/pololu/vl6180x-arduino/ setting up the required library.
Step 4: Putting Together
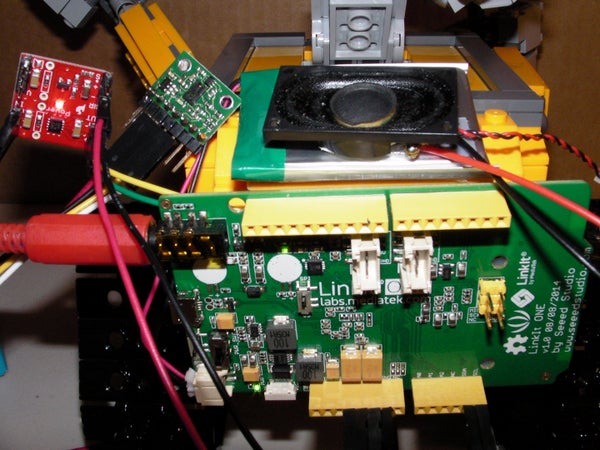
1. Download the attached linkitone-walle.ino, compile and upload to LinkIt ONE.
2. Connect battery to LinkIt ONE.
3. Attach everything to your robot.
4. Turn on LinkIt One and enjoy!
5. Adding more I2C sensors, audio clips, and more programming to make it more fun!
Source: LinkIt ONE Powered Wall-E