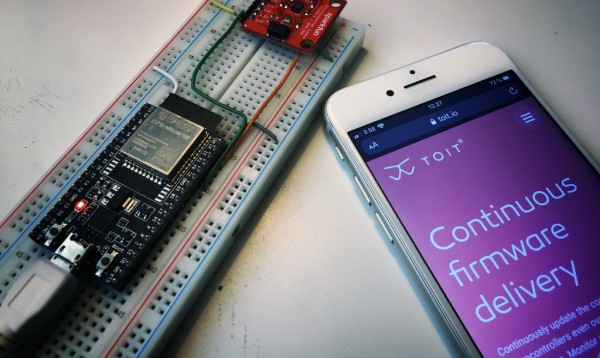
With the Toit platform, developers can treat an ESP32 as a regular computer, installing apps just as easy as on a computer or a phone. Using the high-level language Toit, it is easy to implement functionality and applications while the Toit platform ensures that the device keeps functioning no matter what. This project tests the Toit platform by connecting a BME280 sensor to an ESP32, and reading data from this sensor. The data is published on the Toit console log.
Supplies:
For this project you need an ESP32 dev board. Most boards will work just fine, but in this project the following one is used:
https://www.digikey.com/en/products/detail/espress…
In addition, we need a BME280 sensor. The sensor at the link below is a suitable choice for this project: https://www.digikey.com/en/products/detail/espress…
Step 1: Get Access to the Toit Platform
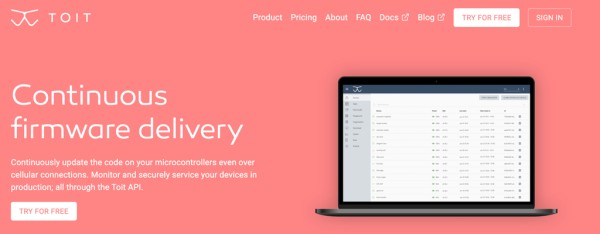
A free account can be created at toit.io. The first 100MB of data that flows from the ESP32 to the platform are for free. Follow the link below, and click “Try for free” on the web page:
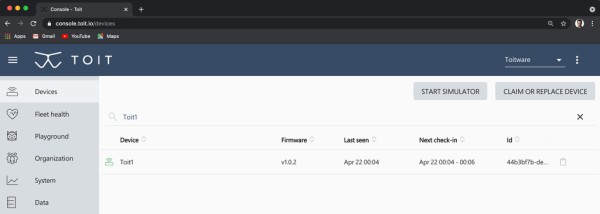
When you sign up, an organisation is created in the Toit console and you’ll get an email to set your password. You can then log on to the console and see your devices once you’ve claimed them (see next section).
Step 2: Provision and Claim Your ESP32
A quick guide on how to install the required Toit software on your computer, provision your ESP32, and subsequently claim it so that it shows up in the Toit console can be found here:
After claiming the device, it should show up in the list of devices within a few seconds. Click on the device for more information about it.
Step 3: Hooking Up Your Hardware
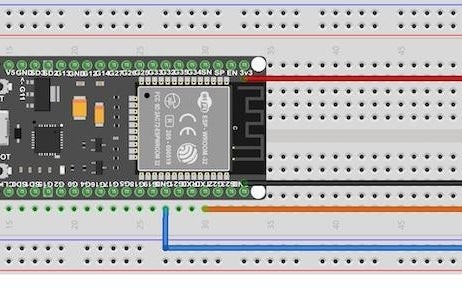
Here is a Fritzing diagram showing how to hook up the BME280 sensor to the ESP32. Note that most ESP32 dev boards are too wide for a standard breadboard. Therefore, wires must be connected under the dev board. Since we’re using I2C for this setup, we connect the wires as follows:
SDA -> GPIO21
SCL -> GPIO22
Finally, we of course need to connect 3.3V and GND.
Step 4: Toit Code and YAML File for BME280
To deploy an app, we need both some Toit code, and a YAML scheduling file.
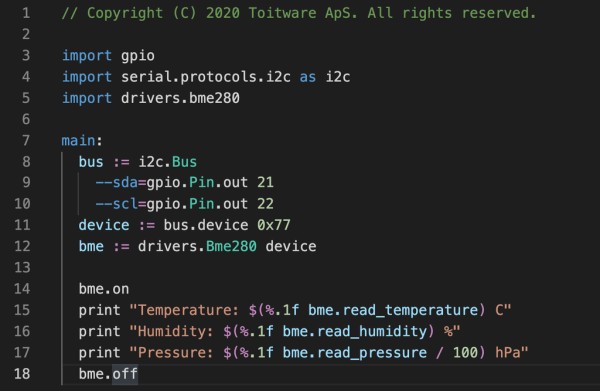
The Toit code is relatively self-explanatory, see below. First we need libraries for GPIO, I2C, and sensor access. In the main function we setup the I2C bus with address 0x77 and set GPIO 21 and 22 to be SDA and SCL, respectively. We also create a sensor object that contains methods for reading data from the sensor. The print command prints data on the log in the Toit console, with formatting.
// Filename: bme280.toit

import gpio
import serial.protocols.i2c as i2c
import drivers.bme280

main:
    bus := i2c.Bus
        --sda=gpio.Pin.out 21
        --scl=gpio.Pin.out 22
    device := bus.device 0x77
    bme := drivers.Bme280 device

    bme.on
    print "Temperature: $(%.1f bme.read_temperature) C"
    print "Humidity: $(%.1f bme.read_humidity) %"
    print "Pressure: $(%.1f bme.read_pressure / 100) hPa"
    bme.off
// Filename: bme280.yamlname: "Measure THP"
entrypoint: bme280.toit
triggers:
    on_install: true
    on_interval: 5s
Step 5: Toit Code and YAML File for Printing Time Stamp

The Toit code for printing a formatted time stamp on the log is as follows:
// Filename: time.toit

main:
    time := Time.now.local
    print "Current Time: $(%02d time.h):$(%02d time.m):$(%02d time.s) - $(%02d time.day)/$(%02d time.month)"<br>
In the YAML file we choose to run this Toit code once we install the app, and then every five seconds:
// Filename: time.yaml

name: "Timestamp"
entrypoint: time.toit
triggers:
    on_install: true
    on_interval: 5s<br>
Step 6: Deploying the Apps
With the Toit and YAML files above saved, we can deploy these apps on the ESP32 using the following commands, given that you named the ESP32 “Toit1” in the Toit console, and that the YAML filenames are “bme280.yaml” and “time.yaml”:
$ toit device -d Toit1 deploy bme280.yaml
successfully deployed the job Measure THP on Toit1
$ toit device -d Toit1 deploy time.yaml
successfully deployed the job Timestamp on Toit1<br>
Source
Source: Parallel Apps on an ESP32 Using Toit Platform for IoT