Summary of Pause Netflix/ Hulu With Alexa
This article details a DIY project to control media streaming services like Netflix and Hulu using an Amazon Echo and a Particle Photon microcontroller. The author repurposes an old USB keyboard by soldering wires to its circuit board to simulate key presses (Spacebar and 'Z'). The system connects the keyboard to a relay controlled by the Photon, which is triggered via voice commands through IFTTT. The setup involves coding the Photon, configuring the wireless network, and assembling the components into a project box for a clean finish.
Parts used in the Pause Netflix/ Hulu With Alexa:
- Particle photon w/ headers
- USB Wired keyboard
- Project box
- Small Breadboard
- Jumper cables / Breadboard cables
- 2 channel 5v relay
- Misc wire
- Micro USB Cables
- Amazon Echo / Dot
There is no way that i have found to interact with a computer via Amazon echo. I wanted the ability to pause Netflix and Hulu using an echo. That is the pretext to this project. I also wanted to use parts i already had and make it as easily as possible. Here are the steps how i did it. I will try to walk you through it as simply as possible for everyone who has never used a particle photon. I will also explain how to set up and code the photon to do what you want it to do.
Step 1: Gather Your Materials

Here are the parts required to do this project.
- Particle photon w/ headers —- adafruit $19.00
- USB Wired keyboard —- I had several sitting around
- Project box — Amazon –$6.51
- Small Breadboard —- Amazon – $6.12
- Jumper cables / Breadboard cables — Amazon -$7.97
- 2 channel 5v relay — Amazon -$6.79
- Misc wire
- 2 Micro USB Cables — one to set up the particle and one to cut in half to power it in the project box
You will also need to have a Amazon Echo / Dot (I would think that would be obvious), and you need to have a wireless network(also needed by the amazon echo). I didnt think i would need to state these but just in case, lol.
Step 2: Prepare the Keyboard Circuit Board
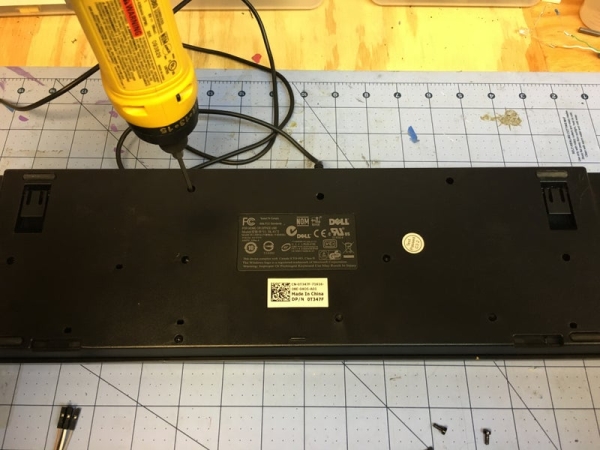
to prepare the keyboard start by taking it apart and finding the circuit board as seen in the photos the keys are registered by the keyboard by shorting two of the contacts on the board. We want the space bar and any other random key. Alternatively you could just use two random keys and then change it to a space bar in software. As you can see in the photos the two plastic sheets with the copper traces on it focus on either end of the board, so we will solder several wires to points on either end of the board as shown and test on a computer to see what keys we can find.
The circuit board on my keyboard had an epoxy coating the contacts so i used sandpaper to make it easier to solder to.
Even after sanding i was having a hard time getting the wires to stick to the solder points, so used a fine drill bit and drilled holes at the solder points for me to push wires through. Then I could solder the wires easily.
I soldered three wires to the right side and three wires to the left side and then plugged the keyboard into a computer and opened notepad. By touching the wires together i found the space bar, left arrow, q, z and scroll lock keys. For our purposes we will use the space bar and the Z keys.
Now take a micro USB cable and cut it leaving about 6 to 8 inches from the micro USB end. strip the outer coating leaving you with 4 inner wires (usually red, black, white, and green), cut off the white and green leaving you with the red and black wires. Strip and Tin the red and black wires and solder them to the keyboard circuit board as seen in the pictures. This will allow us to borrow 5v to power the photon. I also added a zip tie to provide strain relief.
Step 3: Setup the Particle
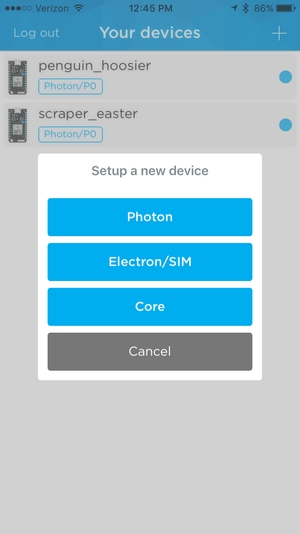
for anyone who has never used a particle photon, I took screenshots of the setup, it is a remarkable micro controller that is flashed over wifi. Here are the steps as shown in the pictures to set up the particle to your network
- Plug the particle photon into a powered USB either on a computer or AC / USB Plug
- on cell phone download and open / sign up the particle app
- connect to the photon-XXXX wireless connection
- tell the program what wireless connection you want to connect to
- that is it, your done, your photon is connected to your wireless network. You can now go to build.particle.io and program / flash your photon from anywhere in the world.
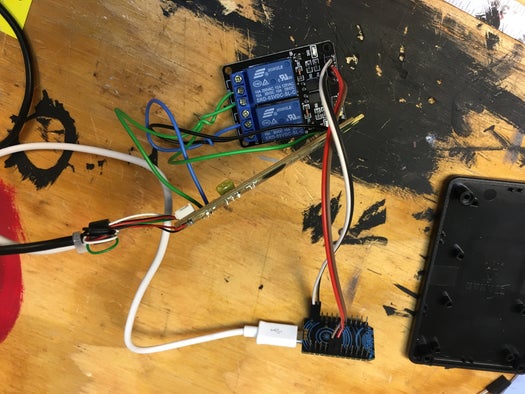
Step 4: The Curcuit
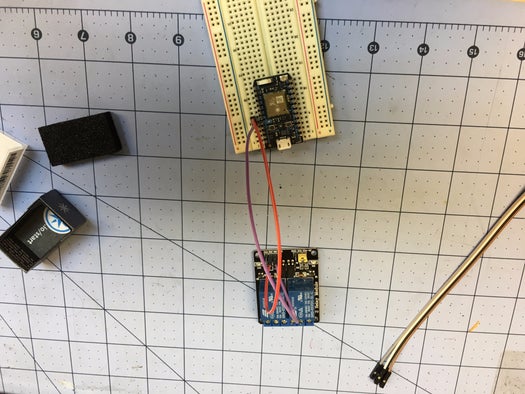
Since we have the photon connected to our network, we can start hooking it up. connect the 5v to 5v on the relay, D7 and D6 to signal on the relay and Gnd to Grd on the relay.
Once this is connected you can test it using the “Tinker” in the particle app on your cell phone /tablet. Just click on D7 and select digitalwrite and you should hear the relay fire.
Go to Build.particle.io and log in, copy the code provided and flash it to your particle photon.
Step 5: IFTTT (If This Then That)

IFTTT is a website that allows you to create “recipes” that automate things. we will make a recipe to make it so when we tell alexa “trigger Netflix pause” it will tell particle to trigger the function we created. Sign up / in to www.ifttt.com and follow the steps in the photos if you are not sure how to create a recipe on the web site.
Make sure when you are creating the recepie and it asks for the function for the particle you type “ENABLE” and then the pin #, so for D7 type “ENABLE7” and for D6 type “ENABLE6” . Remember, you will have to create two separate recipes for each digital pin.
Step 6: Test
Test everything and make sure that it works.
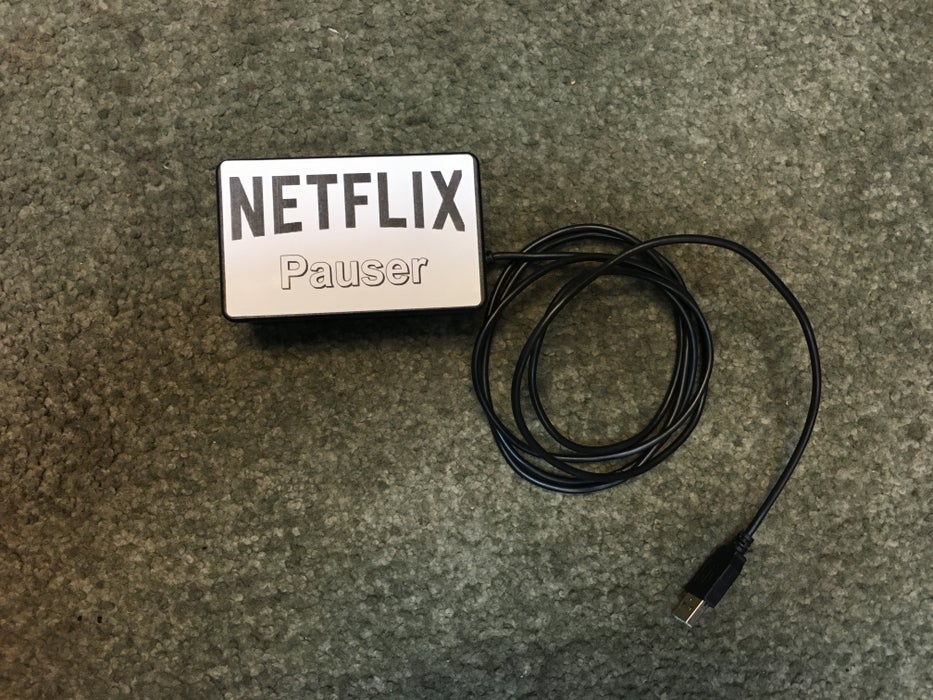
Step 7: Clean It Up and Make It Pretty
Trim the wires, get rid of (or use a smaller)the breadboard. Cram it all into a project box and put a cool sticker on it.
Step 8: Other Applications
OK, so all said and done you should have an extra key that can be fired from the relay, you can make that launch Netflix by using the program I included. It is extinct program, but I have not found another that will not confuse different keyboards. In our example we can use this program to make the “Z” key open www.netflix.com. But in reality you could make it open what ever you want.
I hope you enjoyed my Instuctable. Don’t forget to vote for me in a contest.
Source: Pause Netflix/ Hulu With Alexa
- How do I interact with a computer via Amazon Echo?
You can use a Particle Photon connected to a modified USB keyboard circuit and a relay to send signals like pausing media. - Can I pause Netflix and Hulu using an echo?
Yes, the project allows you to pause these services by triggering a specific key press on a computer via voice command. - What parts are required to build this project?
You need a Particle photon, USB keyboard, project box, breadboard, jumper cables, a 2-channel 5v relay, misc wire, and Micro USB cables. - How do I prepare the keyboard circuit board?
Disassemble the keyboard, sand or drill holes at contact points, and solder wires to specific contacts to register keys like the space bar. - How do I set up the Particle Photon on my network?
Plug the photon into USB power, use the Particle app on your phone to connect it to your wireless network, and flash code from build.particle.io. - How does IFTTT automate the trigger?
Create recipes on www.ifttt.com where saying a phrase to Alexa triggers a function on the Particle pin, such as ENABLE7. - How can I make the Z key open Netflix?
You can use a program to map the Z key to launch www.netflix.com, allowing the relay to open the site when triggered. - How do I test if the relay is firing correctly?
Use the Tinker feature in the Particle app to click D7 and select digitalwrite to verify the relay activates.