
Summary of Soldering stencils for DIY circuit boards.
This article explains a DIY method for applying solder paste to PCBs using a laser-cut plastic stencil. By aligning the stencil over pads and squeegeeing paste through the holes, users achieve precise solder application, even on components with very small pitches like 0.65mm. The process utilizes design software to generate HPGL plotter files from solder mask layers.
Parts used in Soldering Stencils for DIY Circuit Boards:
- Laser cutter
- Plastic material for stencil
- Solder paste
- Squeegee tool
- PCB (Printed Circuit Board)
- Surface mount components
- Design software (e.g., Easy-PC or DesignSpark)
- HPGL plotter file output
This is useful tip for anyone making or using surface mount components on PCBs.
It relies on access to a laser cutter, so if you don’t have one, look away now…..
I cut a plastic stencil on the laser, align it with the PCB pads and then squeegee a thin layer of solder paste through the holes.
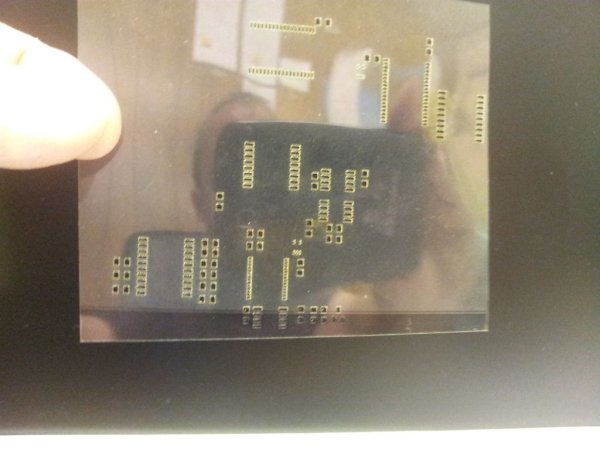
Peeling away the stencil will leave a perfect pattern of pads with the correct amount of solder on each one.
I have just successfully used this process on components with a 0.025″ pitch (0.65mm) – that’s VERY small,
The prototype in the pictures has been made by my good friends at Spirit Circuits in the UK, and is a full plated through, double sided board. with immersion silver coating.
ALL PCB design programs these days will let you produce solder masks for surface mount boards. We take the solder mask output from the program, and direct it to plain, simple HPGL “plotter” files.
Here, I’m using Number One Systems “Easy-PC”, which may look very familiar to anyone using DesignSpark’s free offering.
Turn OFF all the other layers, turn ON the mask layer, change the output device to “plotter” and plot to file. I mirrored the mask, but I am not sure its important. Technically, the holes benefit the process if they are smaller on the TOP of the stencil than the BOTTOM. This ensures a clean peel at the later stages
For more detail: Soldering stencils for DIY circuit boards.
-
How do you apply solder paste using a stencil?
You cut a plastic stencil on a laser cutter, align it with PCB pads, and squeegee a thin layer of solder paste through the holes. -
Can this method handle very small component pitches?
Yes, the author successfully used this process on components with a 0.025 inch pitch which equals 0.65mm. -
What software is needed to create the stencil design?
All modern PCB design programs can produce solder masks, such as Number One Systems Easy-PC or DesignSpark. -
What file format is required for the laser cutter?
You must direct the solder mask output to plain simple HPGL plotter files. -
Does mirroring the mask layer matter for the process?
The author mirrored the mask but is not sure if it is important technically. -
Why should the stencil holes be smaller on top than on bottom?
Holes that are smaller on the top ensure a clean peel at the later stages of the process.
