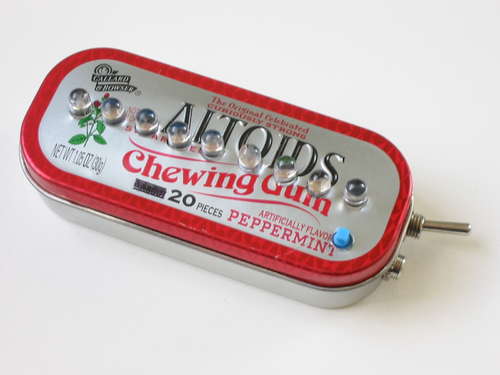
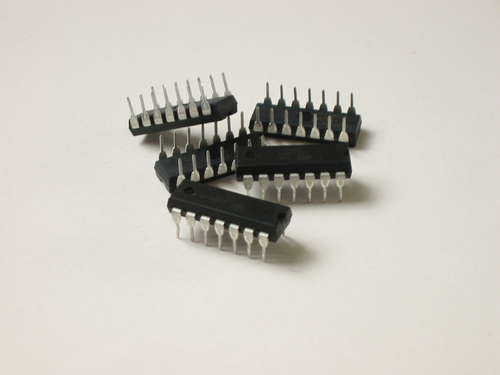
 The projects currently implemented in the SAK include the following. These, along with all of the other code and constants (there is a full font table), take up about 4K of the available space. Lots more room!
MiniMenorah — Evil Mad Scientists
Brain Machine — Mitch Altman
MiniPOV — Adafruit Industries
Noise Toy — Loud Objects
LED Running lights
LED Candle
LED Flashlight
This project would not exist without the considerable generosity of everyone who contributed in one way or another. In addition to the abovementioned, I would like to thank the developers of the software tools used (see in other steps) and anyone that put up a useful website that furthered my understanding of these topics. I can take direct credit for very little of the code used in this project. If you feel that the code is yours, it may well be. Let me know and I will happily give you credit. In any case, thank you for your contribution 🙂
Parts
1 x U1 — ATtiny84 — ATTINY84-20PU-ND
1 x Ux — IC socket 14-pin DIP — A32879-ND
9 x LED — your choice of color
9 x resistors — matched to your LEDs
2 x R1, R2 — 100 ohm 1/4W �1% metal film — 100XBK-ND
2 x C7, C8 — 47uF — P5151-ND
Miscellaneous
Battery Holder 1-AA 6″ wire leads (1) 2461K-ND
Phone jack stereo 3.5mm (1) MJW-22
Toggle switch SPDT 1/4″ on-on (1) MTS-4
Push button switch (1) 450-1654-ND
Minty Boost
The SAK is powered by a single AA battery boosted by a Maxim MAX756 chip (the essential component of the MintyBoost!). The components below are those needed for this part of the circuit.
1 x U1 — MAX756CPA DC/DC 3.3/5V DIP — MAX756CPA+-ND
1 x Ux — IC socket 8-pin DIP — A32878-ND
2 x C7, C8 — 0.1uF — 399-4151-ND
2 x C3, C5 — 100uF — P5152-ND
1 x L1 — 22uH radial — M9985-ND
1 x D1 — 1N5818 Schottky 1A 30V — 1N5818-E3/1GI-ND
ATtiny84 Microcontroller
If you plan on adding programs, obtain a copy of the ATtiny84 datasheet. There are many instructional guides for learning to program this family of microcontroller on the Internet. For a helpful summary of microcontrollers, see How to Choose a Microcontroller.
Note The project described here does not actually have the MiniMenorah fully enabled. The MM requires nine output pins, the Brain Machine two, and the button to change state one, for a total of twelve. While the ATtiny84 can be configured to have twelve output pins, it is at the expense of the RESET pin. Disabling the RESET pin and making it I/O makes the ATtiny84 unable to be programmed with the USBtinyISP progammer (who hasn’t done that 🙂 and requires High Voltage Programming. Everything is in place to enable the MM, but a different programmer is required, and I don’t have one.
AVR Programming Tools
I based mine on the Ghetto Programming Environment. The long pins of the wirewrap chip holder extend down in to a breadboard and makes for a convenient experimental setup.
The only problem I have encountered is that the components from the programming pins cannot be grounded during programming. I have taken two approaches to solve this problem. The first is to have two chip holders, one for programming and one for running (see 8-pin cradle). This is not ideal because it renders a lot of the breadboard unusable and it is quite annoying to move the chip. The second is to install a small switch to disconnect the ground pin from the ground of the breadboard during programming. This works better and leaves more space on the breadboard for components.
Programmer
USBtinyISP kit from Adafruit Industries. With a little modification (remove the 10-pin cable and bend the LEDs) the programmer fits in an Altoids Gum Tin. The 6-pin cable can even be coiled up into the tin for storage.
Software
WinAVR is a collection of open source software development tools for programming AVR microcontrollers on Windows machines. It works well with the USBtinyISP programmer (see the AVR Tutorial).
I recently switched from using the Programmer’s Notepad application that comes bundled with WinAVR to using Eclipse with the AVR Eclipse Plugin. Eclipse can use avrdude, so you will have to install WinAVR anyway. Eclipse has better project management, helpful tutorials, and is free. It took just a few minutes to install it, work through a tutorial, and program a chip.
Phone a friend
There are lots of resources on the Internet. Look for them, ask for help. People can be knowledgeable and helpful. That’s nice 🙂 They also can be dismissive. That’s not nice 🙁
Programming the Microcontroller
C code Don’t criticize what I don’t understand. I am not a programmer, C is not my native language, and I am holding on by a Java-thin thread and a lot of web searching when working in C. Even though much of the code came from other projects (see credits), I did have to make some additions and modifications. The source code for the Swiss AVR Knife is attached below both as a c source file and a hex file. I would appreciate hearing where the code could be improved.
There are a few changes I anticipate making in the code. Updates are forthcoming. In the meantime, the code does work as advertised.
Fuses Microcontroller fuses are confusing. I have disabled a few microcontrollers both by accidentally setting them to look for an external oscillator and by disabling the RESET pin. They can be recovered, but until then they are just dead bugs. Be careful if you choose to change the fuses.
To calculate the correct fuse values, use an online fuse calculator. Select the target part (ATtiny84) and the appropriate settings — internal RC oscillator running at 8MHz (default value), DO NOT divide the clock by 8 internally, enable serial program downloading, and disable brownout detection. The result should be the following.
-U lfuse:w:0xe2:m -U hfuse:w:0xdf:m -U efuse:w:0xff:m (low 0xE2 high 0xDF ext 0xFF).
You only need to burn the fuses once (unless you plan to change them). Eclipse makes this easy, as, I am sure, do other IDEs.
Questions that I would like answered
Any ideas on optimizing the code
Why do the blinking lights in the sound and light machine cause an oscillation in tone when enabled in the tin but not on the breadboard?
Why doesn’t Eclipse like the lightOn and lightOff functions, even though they seem to work?
Breadboarding the Project
Note The order of pins and LEDs is not the same on the breadboard and the PCB (although I suppose you could make them the same). In the code, you will see pieces of code that need to either be enabled or commented out depending on whether the target is the breadboard or the PCB.
Preparing the Altoids Gum Tin
The tin needs three sets of holes. I use a metal punch to mark the hole locations and brad point bits (for wood) to drill the holes. The brad point bits have a center point and two cutting edges. They won’t skate and the edges cut slowly through the metal. Brad point bits are available from Lee Valley (among other places).
The first is a set of nine 5mm holes across the top of the tin for the LEDs. Metric brad point bits are available and they make clean and snug holes for the LEDs. Create a paper template with the holes marked and transfer the marks to the top of the tin. In order to prevent pushing the top of the tin in, support the inner part of the lid on a small block of wood when punching and drilling the top. With the paper and wood in place, I dimple the tin using the punch. When drilling, go slowly at first. The cutting edges of the brad points should make an even circle. Drilling with the bit anything but perpendicular to the surface may result in the bit grabbing and tearing the metal.
The 5mm brad point makes a nice clean hole, but I found that I had to widen it ever so slightly. I did this by drilling out from the inside with a regular 13/64″ bit.
The second set consists of two 1/4″ holes on the right side of the tin for the switch and audio jack. Because of the tight curvature at the end of the tin, these holes need to be fairly close. Make sure to space them so that the components fit in the tin. Center them vertically on the portion of the side visible when the lid is closed. Mark with punch and drill very carefully. The caution about the bits grabbing the tin applies more strongly with the bigger bits.
The last hole is for the pushbutton switch. Position the hole towards the bottom right in such a way that the pushbutton does not interfere with the other components in the tin.
Designing and Making the PCB
There are numerous resources on the Internet that describe the process of creating PCBs. None of the methods is foolproof or easy, but it is important to get comfortable with at least one.
I use the the freeware version of the EAGLE Layout Editor from CadSoft to create the schematic and layout the printed circuit board. My approach to manufacturing the PCB is described in the Making and Preparing the PCB step of the Altoids Tin Speaker instructable.
After transfer, etching, and drilling the board, you are ready to solder everything together.
Note My most recent experience for transfer images to circuit boards is the following. Wash the board well with dish soap and scrub it with a green scrubby. Gently sand any burrs off of the edges of the board so that the transfer paper and iron make good contact with the board. Preheat the iron. Place a piece of paper on the board and the heat the board with the iron. After the board is quite hot, carefully place the prepared transfer paper on the board. It will stick right away (because the board is hot) so make sure that it is correctly positioned. Then iron directly on the shiny back of the transfer paper. This never caused me any trouble, but you are using your own iron. Test first. Let the board cool and then run it under cold water. The transfer paper should pop off and leave the entire image. Use an 8x slide/negative viewer to look over the transfer and fill in any missing pieces. Good luck.
For more Detail: Swiss AVR Knife using Microcontroller ATtiny84

