
Summary of AVR Project – Relay Timer with ATmega8 AVR MCU
This article describes a simple microcontroller-based timer using an ATmega8 AVR MCU. It features a 16×2 LCD for the user interface and a 3-button keypad for setting time intervals. The system allows users to turn a load on or off after a specified duration, displaying countdown status in real-time. The project utilizes xBoard MINI for prototyping and requires AVR development tools like avr-gcc and eXtreme Burner.
Parts used in the Simple Timer Project:
- ATmega8 Microcontroller
- 16×2 LCD Module
- 3-Button Keypad
- xBoard MINI Development Board
- Relay (for load control)
- eXtreme Burner Software and Hardware
- AVR Studio
Timers are widely used in industrial and domestic application for automating tasks. Microcontrollers can be used to design versatile and accurate timers with ease. Here I present a simple timer that can be used to turn on/off a load after user specified time.
The Timer uses a standard 16×2 lcd module for user interface (UI). User can set the time using a 3 button keypad.
After that Timer is started. While count down is in progress, the time left is displayed on screen.
The program use our LCD driver library more details of which can be found in here. Use avr-gcc + AVR Studio to compile.
The prototype was developed using xBoard MINI, a low cost easy to use ATmega8 development board. The program was burned to the MCU’s flash memory using eXtreme Burner – AVR Software and Hardware. A basic knowledge of working with different tools of AVR development is required, so please refer to following articles.
Using the Timer
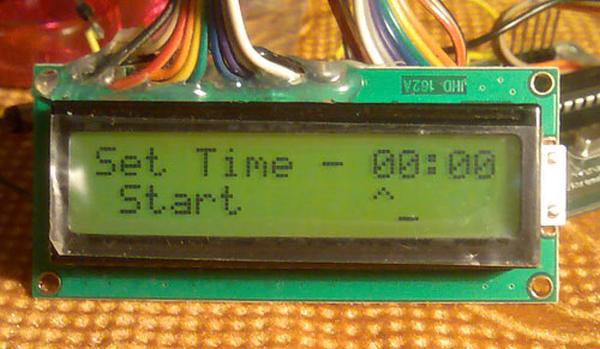
The user interacts with the timer using 3 push buttons and the LCD module. The function of 3 keys are :-
- Select Key – Select Different items like hour,minute and start. It moves the arrow on screen to indicate which option is currently selected.
- Up/Increase Key – Increase the value. For example, select “minute” using “select” key and press this to increase its value.
- Down/Decrease Key – Same as above but it decreases the value.
When the timer is powered up the load is in off state. A welcome message is shown. Then you can set the time using the above buttons. After that move to “start” option by using select key. Then press any key to start the timer. Now the screen shows the count down and the load is powered on. When count down reaches 0 the load is turned off. The pictures and videos below illustrate the process.
Read More: AVR Project – Relay Timer with ATmega8 AVR MCU
- What components are used for the user interface?
The project uses a standard 16×2 LCD module and a 3-button keypad. - How does the user select different options on the screen?
The Select Key moves the arrow on the screen to indicate which option is currently selected. - Can the user increase the time value?
Yes, pressing the Up/Increase Key increases the value of the selected item. - What happens when the count down reaches zero?
The load is turned off when the count down reaches 0. - Which development board was used for the prototype?
The prototype was developed using the xBoard MINI, a low-cost ATmega8 development board. - What software is required to compile the program?
The program requires avr-gcc and AVR Studio to compile. - How is the program burned to the MCU's flash memory?
The program is burned using eXtreme Burner – AVR Software and Hardware. - Is the load powered on immediately after turning on the power?
No, when the timer is powered up, the load is in the off state.