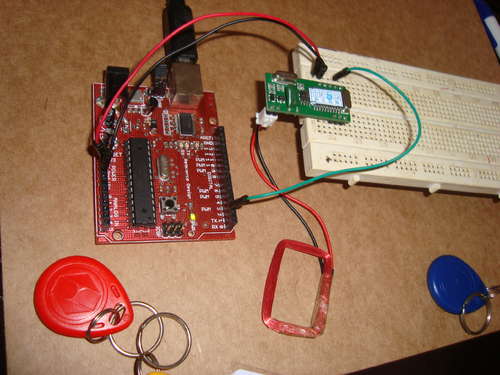
How to connect Arduino and RFID

Arduino and RFIDOn this instructable I will try to show how to interface a RFID sensor with the Arduino. I am using the RFID sensor from seeedstudio the serial version of it. There are a few parts you will gonna need. I also bought some RFID keys.
UPDATE: Now it works with IDE 021

Step 1 What you gonna need?

– Arduino Board
– RFID Sensor from seeedstudios
– Wires
– Protoboard
– RFID tags (125kHz) from seeedstudios

Step 2 Plugging all together
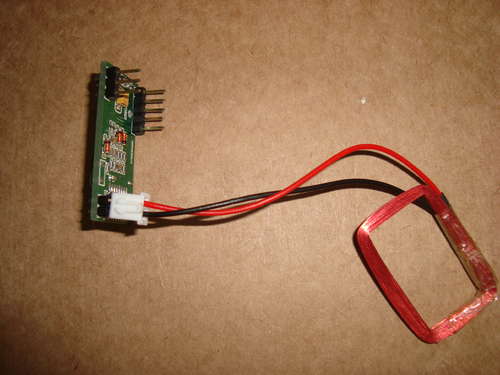
Plugging all togetherConnect the antenna on the appropriate pins like the first photo.
Plug the RFID sensor to the protoboard like the second photo above.
Only 3 wires are required to interface, 2 wires for supply and another for the serial line(communication)
The wires as connected as the third photo shows.
On RFID sensor: PIN 1 -> Tx
PIN 2 -> Rx (Not Used)
PIN 3 -> NC
PIN 4 -> GND
PIN 5 -> VCC (+5V)
Tx from RFID board goes to Digital PIN 2 on Arduino Board.
That is all you gonna need to wire.
Moving on to next step, the software.
For more Detail: How to connect Arduino and RFID


About The Author

Ibrar Ayyub

I am an experienced technical writer holding a Master's degree in computer science from BZU Multan, Pakistan University. With a background spanning various industries, particularly in home automation and engineering, I have honed my skills in crafting clear and concise content. Proficient in leveraging infographics and diagrams, I strive to simplify complex concepts for readers. My strength lies in thorough research and presenting information in a structured and logical format.

Follow Us:
LinkedinTwitter

Leave a Comment

Your email address will not be published. Required fields are marked *

Scroll to Top