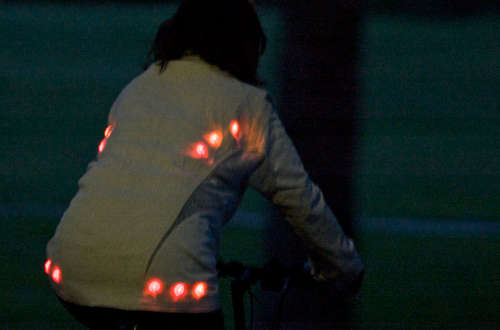
Step 1 Gather stuff for the project
This project includes working with textile and a bit of electronics.
To make the jacket I used the following tools:
– sewing machine
– sewing needles
– seam ripper
– enough cloth to make a jacket
– tape measure
– pins
– sewing thread in different colours
– 16 semitransparent buttons
electric tools/equipment:
– multimeter
– conductive sewing thread
– Lilypad Arduino
– 2 Lilypad pushbuttons
– Lilypad batterypack
– 6 red 3mm LED
– 6 orange 3mm LED
– 2 white 3mm LED
– puffy fabric paint
Step 2 Start our own sewing project!
The project starts pretty simple; acquire a jacket you like, I am using a sporty running-jacket. You can either use the jacket as it is, or you can take it apart with a seam ripper. When the jacket is taken apart, quickly iron out the parts, especially the seams, to make it easier to transfer the pattern to the textile. For my jacket I use 3 different textiles, Hemp Denim (500gsm), Hemp canvas (300gsm) and wool jersey (200gsm). Denim for the front and back, canvas for arms and wool underneath the arms.
Open up seams and lay the parts on your textile. Outline the parts with tailors chalk or a coloured pencil, and cut out the pattern with a pair of sharp scissors. Make sure to lay the textile in double layers, to get two mirrored identical parts (for the ones that are identical).
Step 3 Sewing the jacket
For complete instructions on how to assemble and sew a piece of clothing, I will recommend another tutorial on this site. This is on of my first sewing projects, and I have limited skills. I have assembled the jacket inside out. I have mostly used a jeans seam, with a strong polyester thread. This makes it a solid piece of clothing.
The original jacket, being a running-jacket, has a thin netting fabric underneath both arms to keeps your body cooler under sweaty conditions. I have replaced this with a comfortable thin wool fabric. When sewing this thin wool together with a thick hemp denim, make sure not to stretch the cloth. I was forced to undo the seams more than once, and I assure you, opening up a seam on thin wool is a bit of a task!
Step 4 Exploring with electronics

The standard 3mm LEDs come equipped with an epoxy lens to direct the light in one way. With some sandpaper, rub down the lens, so you are left with only the metal core. Caution! if you look closely, you will se that there is a small metal wire right above the light source, do not rub this away! At a local store I found some simple semitransparent buttons, 14 for the lights and 2 for the pushbuttons. Using a mounted or handheld powertool, make a small hole where it makes most sense to place the LED. My hole measures 6mm in diameter, 2mm deep. I have placed the hole below the button-holes. Bending the legs on the LED so they are pointing in the same direction as the light, the legs are put where the button-holes are. To make it look better, cut two small grooves from the LED hole to the button-holes, one for each leg. The reason for this is that you will later sew the buttons to the jacket with conductive thread. The conductive thread will connect with the led LED legs, + and -, and make them shine!
Remember: on normal LED lights, the longest leg is +. place all the LEDs the same way, and it will be easier for you!
Step 6 Make your own interactive jacket
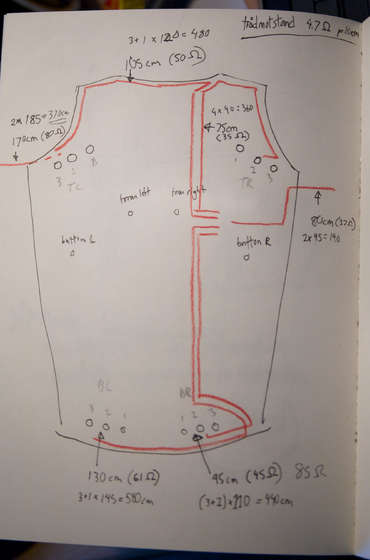
With all the LED buttons ready and the schematics at hand, it is time to start sewing with conductive thread. The 4-ply conductive thread is placed in the bottom thread, with a cotton or polyester thread on top of the sewing machine. I have measured up all the lengths, with approximately 20cm excess on each end. I have decided to place the mainboard and battery at the inside on the front of my jacket.
All the lights at the back of the jacket are in pairs of three. This means that each section has to have 4 connections, one for each light(+), and a ground(-). Make sure no conductive thread is overlapping without placing something in between. This is where the ground(-) for each button have to overlap the other threads. This for my part is the most time consuming, but keep in mind, this is where you can experiment with ornaments and coloured threads!
When all the theads are in place, it is time to start sewing the buttons together. Caution: when sewing the button, + and -, make sure they don’t touch each other, this will cause a short. With a small needle, I sew each thread 3 times, making sure there is a firm connection with the LED legs. Do the same with the pushputtons, placed on each arm. On top of the pushbuttons I have simply sewn a button on top, to make it look better, and making it a larger button. As well as tying a knot to fasten the button, use a soldering-iron to melt the end thread to its self. This reduces risk of the two threads touching and creating a short!
For more Detail: Light for life: Glowing button cycling jacket
