
Summary of Mandelbrot Set on Pi Pico / ILI9341
This article details a project rendering the Mandelbrot Set on a Raspberry Pi Pico using MicroPython and an ILI9341 SPI TFT display. The author adapted existing code to visualize fractal zooming and panning, controlled by potentiometers and a button. The setup requires Thonny IDE for coding and uploading, with specific wiring instructions for the display and input components, noting voltage considerations for the TFT module.
Parts used in Mandelbrot Set on Pi Pico / ILI9341:
- Raspberry Pi Pico
- MicroPython firmware
- Thonny IDE
- 2.8" ILI9341 SPI TFT display
- ILI9341 driver library (jeffmer/micropython-ili9341)
- Button with pull-down configuration
- Potentiometers (for zoom and pan control)
- Voltage regulator (if required by the TFT board)
Mandelbrot Set is IMHO the most famous fractal. Read here for additional info: https://en.wikipedia.org/wiki/Mandelbrot_set

This project was inspired by https://hackaday.io/project/177884-mandelbrot-on-p… I reused most of the original code, but decided to implement it with 2.8″ ILI9341 SPI tft using Pico micropython driver from https://github.com/jeffmer/micropython-ili9341. This is my first project with Pi Pico and micropython.
Step 1: Set Up…
I assume you have Pi Pico with micropython loaded, Thonny IDE installed and you are somewhat familiar with Pico and micropython. If not – there is a great introduction on all subjects related at https://www.raspberrypi.org/blog/new-book-get-started-with-micropython-on-raspberry-pi-pico/
Step 2: Get the Software…
Install ILI9341 drivers into Pi Pico’s lib directory using IDE. Download attached file and open it in IDE.
Step 3: Wire the Hardware…
Code contains definition of wiring for button, potentiometers and tft (see comments and pin definitions in the source file). The button is wired with pull-down, so that when pressed it sets Pico’s pin to 3.3V. Wire button, tft and potentiometers as defined in the code. I had tft that had voltage regulator on board so I had to power tft from 5V. If your’s doesn’t have regulator, power it from 3.3V (Pico has outputs for both when powered from usb).
Step 4: Upload and Run…
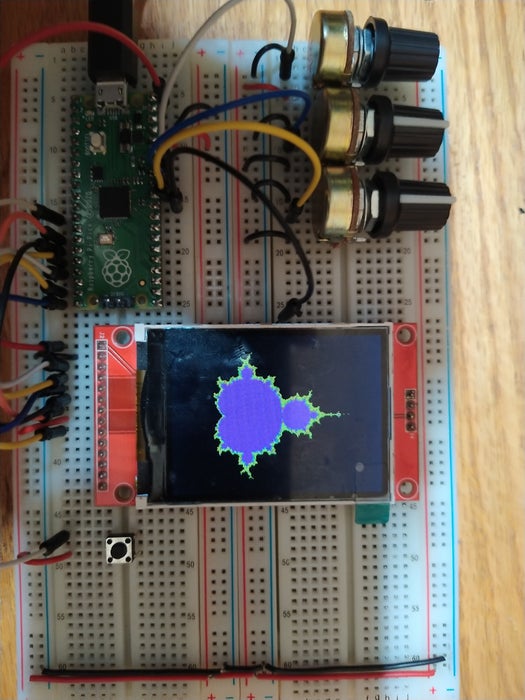
Use IDE to upload file to pico. Upon start you’ll see in serial console window of IDE how potentiometers values are translated to zoom and pan values displayed every half second. Good starting values are 0 for pan_x and pan_y, and 1 for zoom. When you press button, mandelbrot set will be built and displayd on tft, it will look like first picture. You can play with zoom and pan to see enlarged parts of the set, like shown on the second picture.
Source: Mandelbrot Set on Pi Pico / ILI9341
- What software is required to set up this project?
You need Pi Pico with MicroPython loaded and Thonny IDE installed. - How do I install the necessary drivers?
Install ILI9341 drivers into the Pi Pico's lib directory using the IDE by downloading and opening the attached file. - Can I power the TFT from 5V?
Yes, if your TFT has a voltage regulator on the board, you can power it from 5V; otherwise, use 3.3V. - How are the potentiometers used in this project?
Potentiometer values are translated to zoom and pan values displayed every half second. - What happens when the button is pressed?
Pressing the button builds and displays the Mandelbrot set on the TFT. - What are the recommended starting values for controls?
Good starting values are 0 for pan_x and pan_y, and 1 for zoom. - Does the code define the wiring for components?
Yes, the code contains definitions for the button, potentiometers, and TFT wiring in comments and pin definitions.
