One of the most basic autonomous robot you can build is a line following robot(LFR). This type of robot is run over a white surface which has an arbitrary path drawn over it by using back paint. The task of the robot is to run exactly along this painted path. You may note that the surface may also be black(or any other dark colour), in that case the path is a light colour like white. Please watch the following video for a LFR in action.
Designing an LFR
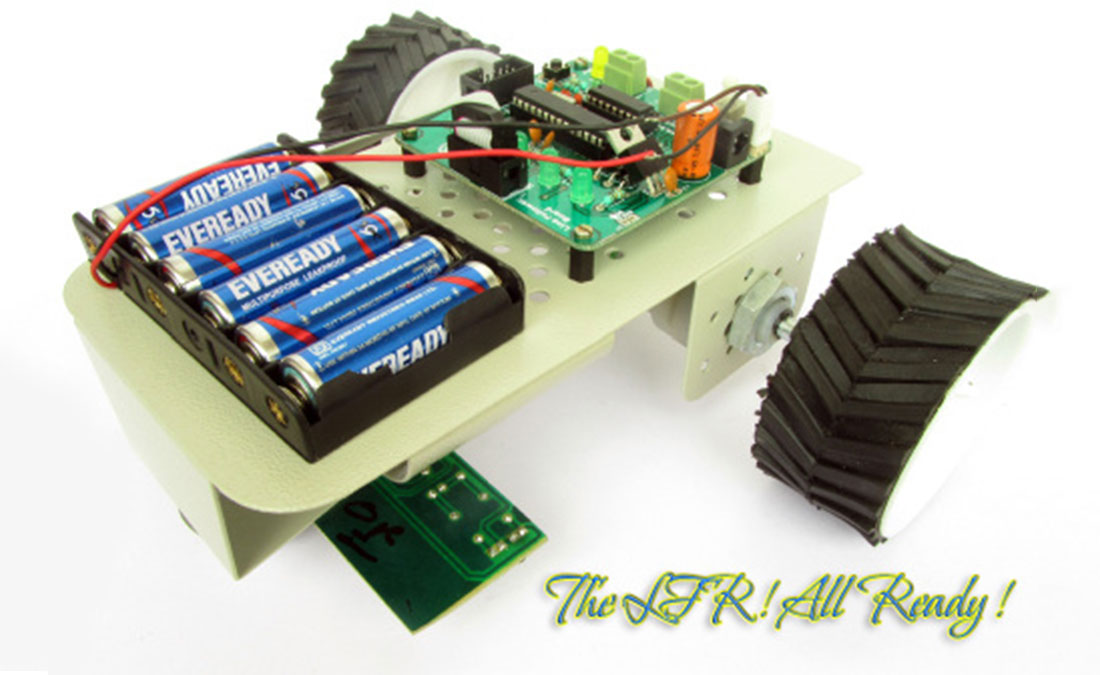
At minimum our LFR design require the following components.
- A sensor to detect the line on the surface.(It can be a simple IR Reflectance Sensor or an high end camera!). We will use a simple IR based sensor, it is cheap and easy to build and use. This article describe how to make a line sensor array.
- A microprocessor to run the code that takes inputs from the sensor and control the motion of robot. We will use a cheap single chip computer called an microcontroller (MCU). A popular family of microcontroller is AVR series from Atmel. A member of the popular family is ATmega8. ATmega8 is chosen because it has just the required amount of resources and is very low cost.
- The MCU cannot drive the motors (used to actually make the robot run) directly, so a motor driver is used. A motor driver in our case is a simple 16pin chip called L293D. It can drive 2 DC motors. We use a technique called PWM to vary the speed of motor digitally from the MCU. The drive mechanism is a differential drive in which we do not require to turn the front wheel for changing direction of heading. Only two rear powered wheel is enough for motion and turning. This is different from the way cars and bikes are turned, in these the front wheel is turned to turn the vehicle. More information on differential drive is give in this article.
- Wheels that are connected to motors shaft the motor.
- Battery to power the whole thing.
- A chassis to hold everything.
The Mechanical Construction of Robot.
The robot is build using common and low cost parts easily available online.
Mechanical Construct is described in detail here.
Electronics for the Robot.
The electronics for the robot is kept as simple as possible. The electronics board is split into to parts.
- The main board that has the MCU, basic MCU support circuit, motor driver and indicator LEDs.
- The line sensor board that is connected at the bottom part of the robot.
These two units are neatly connected using a FRC cable(see this).
The schematic for line sensor array is given in this article.
Purchase
You can purchase both the circuit boards made using high quality PCBs and parts. Simply follow the link. Our store accept online payment using debit cards, ATM cards and Net Banking. The products will be delivered to you door steps within 3-5 days any where in India using quality courier service.
- Fully assembled and tested main board.
- Fully assembled and tested line sensor board.
other wise you can build the circuits on a general purpose PCB or breadboard. But those are lot messy, bulky and does not fit well in the chassis. Beginners should avoid using them. You can save lots of time and pay more attention in the program part that is more important.
The program for LFR.
The LFR Program needs help from three libraries :-
- LED lib (to turn on/off five indicator LEDs)
- Motor lib (to control the speed and direction of rotation of motor)
- ADC lib (to configure and use the analog to digital converter of ATmega8)
The code is written using the C language so you need to be comfortable with the following.
- Syntax of C language.
- Concept of libraries.
- Source File, Header File etc.
- Preprocessor, Compiler and Linker, what they are and what they do and how to use them.
The IDE (Integrated Development Environment) that is a software suite that let you enter, edit, compile,debug project and manage files in project. The IDE that we are using is the latest Atmel Studio 6. Introduction to AS6 is here.
A new project is created as described in above tutorial and configured then the library files LED,Motor and ADC needed to be added to the project. Adding a library to current AS6 project is described in libraries manual.
#include <avr/io.h>
#include <util/delay.h>#include "lib/adc/adc.h" For more detail: Line Following Robot using AVR ATmega8